Beyond Borders
Send MoneyLifestyle & Culture

Benkei’s Spear: Japan’s Viral 200 Pound Strength Challenge Everyone Wants to Try
Visitors to Kyoto's Kiyomizu-dera Temple attempt to lift a 200-pound iron staff known as Benkei's Spear. Here's the folklore, history, and meaning behind the viral challenge.
Read More

Holidays This Week: June 8–14 2026
Discover the key holidays, international observances, and awareness days happening June 8–14, 2026—including World Oceans Day, Flag Day, and World Blood Donor Day.

World Blood Donor Day 2026: Why Your Donation Matters
World Blood Donor Day is June 14, 2026. Learn what the day means, why blood donation matters, and how you can get involved—whether or not you can donate.

World Softball Day 2026: Everything You Need to Know
World Softball Day 2026 falls on Saturday, June 13. Discover the history, global events, and practical ways to celebrate and get involved this year.
Money Transfers

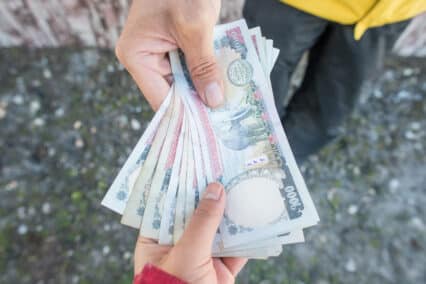
Remitly vs. Wise for India: Compare Fees, Exchange Rates, and INR Delivered From the US [2026]
If you are comparing Remitly vs. Wise for sending money to India from the United States, one question matters most: how many Indian rupees does your recipient get?
Read More

What to Know About Sending Money Internationally in June 2026
June means travel, graduations, Father's Day, and hurricane season. Here's what to know about international money transfers this month.
5 Steps to Safely Send Money to Nepal
Learn how to send money to Nepal in five simple steps with our comprehensive guide. See why millions trust Remitly for secure transfers and fast delivery.

5 Steps to Safely Send Money to Costa Rica
Do you send money to Costa Rica? In this article, we will cover how to send money to Costa Rica with Remitly and common FAQs.
Immigration & Living Abroad
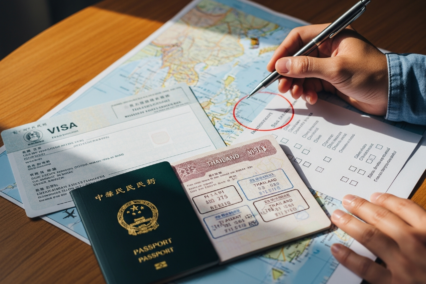
Visas in China: A Closer Look
Discover everything you need to know about visas in China. Our blog provides essential tips and guidelines to help you navigate the application process.
Read More

Visas in Cuba: The Essentials
Planning a trip? Discover everything you need to know about visas in Cuba, including types, requirements, and tips for a smooth travel experience.

Understanding Visas in Brazil
Navigate the complexities of visas in Brazil with our comprehensive guide. Learn about types, requirements, and tips for a smooth application process.

Visas in Papua New Guinea: The Full Picture
Discover everything you need to know about visas in Papua New Guinea. Our comprehensive guide covers types, requirements, and application processes.
Personal Finance

8 of the Most Popular Banks in India
This guide helps you identify some of India’s most popular commercial banks, many of which offer a broad spectrum of financial services.
Read More

Minimum Wage in France: Everything You Need to Know
Explore the minimum wage in France, including hourly rates, monthly earnings, and comparisons with other European countries.

How to File Taxes as a Nonresident in the Netherlands
Learn how to file taxes in the Netherlands as a nonresident with our easy guide. Get clear information on forms, regulations, and deadlines.
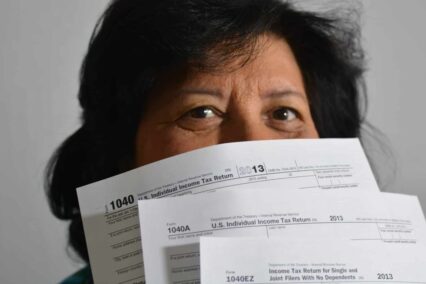
Where to File Taxes in 2025: A Guide for New U.S. Residents
This post has a summary. Get to know the top points.
Business

How to Pay a Business, Vendor, or Supplier in Mexico for the First Time From the United States
Paying a Mexican supplier for the first time? This step-by-step guide covers documentation, banking details, currency, and compliance — simply explained.
Read More

Your Client Wants to Pay With Remitly: Now What?
Did a client mention Remitly? Learn how to request payments, track funds, and receive your earnings in this simple guide for freelancers.

Managing Cash Flow as a Freelancer Working Across Borders
Learn practical strategies to manage cash flow challenges when freelancing internationally. Tips for currency management, payment optimization, and financial stability.

New York, New York: Best Businesses to Start and Top Industries
Discover the top industries and best businesses for doing business in New York City. Explore our blog for insights on starting your venture in the Big Apple!
Travel

Wait, Is Seattle Really That Hilly? A First-Time Visitor’s Guide to Seattle’s Hills
Wondering if Seattle's hills will ruin your trip? Learn which neighborhoods to avoid and how to navigate the city's steep streets safely and easily.
Read More

Weather in Iran: What You Should Know
Discover the diverse weather in Iran, from scorching summers to chilly winters. Learn what you should know to plan your visit effectively on our blog!
Understanding the Weather in Papua New Guinea
Discover the unique weather in Papua New Guinea and how it influences daily life. Read our blog for insights on climate patterns and seasonal changes.

Weather in Fiji: What to Expect
Planning a trip? Discover the weather in Fiji: what to expect during your visit, including climate details and the best times to experience paradise.
World Currencies

The Best Canadian Dollar Rates: A Guide to Converting, Exchanging, and Transferring Canadian Dollars
Discover the guide to the best Canadian dollar rates for converting, exchanging, and transferring your money in Canada and abroad.
Read More
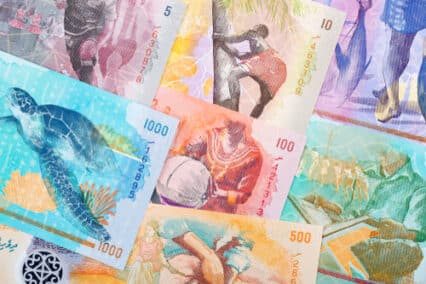
Your Guide to the Maldivian Rufiyaa
The Maldivian Rufiyaa (MVR) is as vibrant as the islands themselves, showcasing marine themes and serving the country's thriving hospitality sector.

Serbia Currency: The Story of the Serbian Dinar
Though it’s located in Europe, Serbia’s currency is the Serbian dinar, not the euro. Read on to learn about this currency’s past and present.

Swiss Franc 101: History and 6 key facts about Switzerland’s currency
Switzerland is not in the EU, so it has its own currency. Learn about the Swiss franc’s past and present as well as some interesting facts.
Food
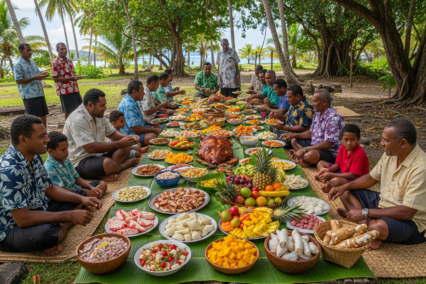
When Do People Eat in Papua New Guinea?
Discover the unique meal times in Papua New Guinea and how local customs shape dining experiences. Explore more in our insightful blog post!
Read More
Meal Times in Fiji: A Cultural Overview
Discover the unique meal times in Fiji and how they reflect the island's rich culture. Join us as we explore traditional dining customs in our blog!

When Are Meals Served in New Zealand?
Curious about meal times in New Zealand? Discover when meals are traditionally served and how dining customs vary across the country in our latest blog.

Meal Times in Australia: What to Expect
Discover the typical meal times in Australia and what to expect during dining hours. Learn about local customs and traditions in our latest blog post!
Education

Brazilian Portuguese Phonology: A Complete Guide to Sounds and Pronunciation
Dive into Brazilian Portuguese phonology with our complete guide to sounds and pronunciation. Master the nuances of this beautiful language today!
Read More

French Vowels: A Complete Guide to Every Sound
Master the sounds of the French language with our complete guide to french vowels. Explore each vowel's pronunciation and usage in our latest blog post!

Azerbaijani Vowels: A Complete Guide to Every Sound
Dive into our complete guide on azerbaijani vowels! Discover every sound and master the nuances of this unique aspect of the Azerbaijani language.

British Vowels: A Complete Guide to Every Sound
Dive into our complete guide on british vowels and discover every sound you need to know. Enhance your pronunciation skills today!
Jobs and Careers

How Much Do Travel Agents Make? Income From Commissions and Client
Learn how much travel agents make and what factors influence their income. Explore our blog for essential information and tips on this career.
Read More

How Apprenticeships Work—and Why More People Are Choosing Them
Learn what an apprenticeship is, how they work, common industries, salary expectations, and how to get started on an apprenticeship career path.

Work From Anywhere Jobs: Top Roles for Digital Nomads
Looking for work from anywhere jobs? Check out our blog for top roles that let you embrace the digital nomad lifestyle and enjoy ultimate flexibility.

What Is a Union? Definition, Purpose, and How They Work
Curious about what is a union? Discover its definition, purpose, and how they work to protect workers' rights.
Technology

Electrical Outlets in Hong Kong: A Guide for Travelers
Planning a trip? Discover everything you need to know about electrical outlets in Hong Kong to keep your devices charged and ready for use.
Read More

Electrical Outlets in Taiwan: What Every Traveler Should Know
Planning to travel to Taiwan? Learn about electrical outlets in taiwan to ensure your devices stay charged and ready for your adventures.

Plugging In: Electrical Outlets in Cambodia
Discover everything you need to know about electrical outlets in Cambodia, including types, voltage, and tips for travelers. Read our blog for more details!
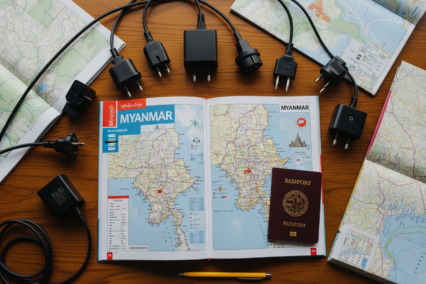
Electrical Outlets in Myanmar: A Traveler’s Guide
Planning a trip? Discover everything you need to know about electrical outlets in Myanmar to keep your devices charged and ready for adventure!
Remitly’s Scam Awareness Center

Remitly’s Scam Awareness Center
Romance Scams: Learn the Red Flags and How to Protect Yourself in 2026
Discover the red flags of romance scams in 2026 & learn how to protect yourself. Stay safe with our insightful guide.
Read More

Remitly’s Scam Awareness Center
Holiday Scams to Avoid: Tips to Stay Safe During the Festive Season
Learn how to spot and avoid holiday scams this festive season. Get simple tips to protect your money and personal information in our comprehensive guide

Remitly’s Scam Awareness Center
Scam Recovery Begins Here: How to Take Action and Find Help Around the World
Recover from scams quickly with Remitly’s global guide. Learn to spot warning signs, report fraud, contact your bank or payment provider, and access trusted support services worldwide.

Remitly’s Scam Awareness Center
Online Shopping Scams: Common Tricks and How to Outsmart Them
Stay informed with our online shopping scams guide. Discover the most common online shopping scams and learn how to protect yourself from scammer tricks.