Key Highlights
Planning a trip to India from New Zealand is exciting, but you need to get ready in the right way. Here are the main things you should know.
-
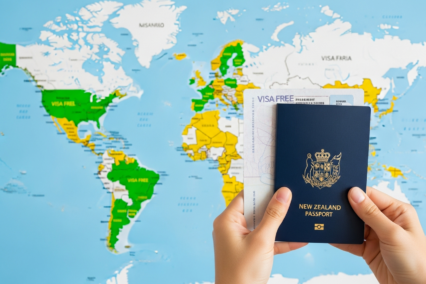
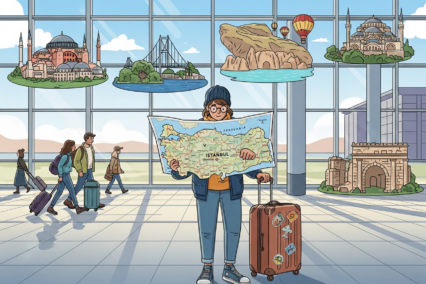
All New Zealand citizens must have an Indian visa. Many people choose the online tourist visa.
-
Make sure your passport will be valid for at least six months from when you arrive in India.
-
The visa application process includes filling out an application form online and paying an application fee.
-
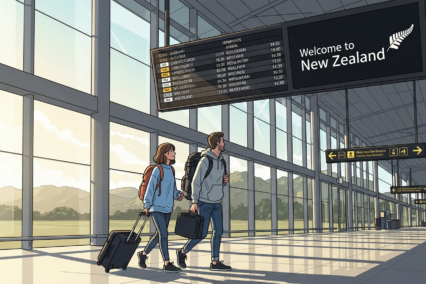
Flights from New Zealand to India do not go direct, so you will need to change planes at least once.
-
To have a great time, remember tips like dressing in a simple way and watching what goes on around you.
-
If you want an easier trip, booking an all-inclusive tour is a good idea. It can cover your flights, visas, and where you stay in style.
Introduction
Are you thinking about seeing the bright colours, great history, and tasty food in India? Going from New Zealand to this exciting country can be a big adventure. You will find busy city streets in Delhi, and calm waters and towns in Kerala. There is something for everyone when you go to India. To make your trip easy, you need to know about the things you need before you travel, like getting your Indian visa. You must start with the visa application. This simple guide will show you what you have to do, starting from filling out the visa application form, up to booking your flight. There are also some handy tips for travel that can help you enjoy your journey even more.
Understanding Travel from New Zealand to India
Going from New Zealand to India can be very exciting. To have a smooth trip, it’s important to understand the visa requirements and the application process. Most New Zealanders choose the India tourist e-visa because it is easy to apply for online.
India is usually safe for travellers. Many people from New Zealand enjoy their time there with no problems. If you stay aware of your things and follow local rules, you should have a safe and great time. Now, let’s look deeper into what the journey is like.
Overview of the Journey
The journey from New Zealand to India starts with a few main steps. First, you have to get your visa sorted. The visa application process is mostly online. You fill in an application form with your travel and personal details. It’s good to start the visa application early. This gives you enough time in case the visa application process takes longer.
After your visa is approved, you can go ahead and book your flights. You can do this through airline websites or by speaking with a travel agent. There are also tour packages like the ones from Real India Tours NZ. These package deals often include your flights. This can make the process a lot easier for you.
The last thing to do is plan out your trip. You might want to see the Golden Triangle or visit the south. Having a good plan will help you get the most out of your time in India.
Common Reasons for Visiting India
India brings people in from all around the world for many reasons. There is so much to see and do, so anyone can find something special here. It’s a great place for your next holiday.
People visit the country for all kinds of trips. Some come for spiritual reasons, while others are after some fun on an adventurous trek. There is a vibrant culture, amazing food, and so much history to see. Some of the main reasons people come are:
-
Tourism and Leisure: People explore famous places and enjoy being part of the local scene.
-
Cultural Immersion: There are many chances to join in with the rich traditions, festivals, and arts.
-
Business: Lots of travellers come for meetings or to attend big talks, or to check out business openings.
-
Medical Treatment: The country offers special health care for those who need it.
No matter why you are here, India gives you the chance to go on a trip that is full of excitement and new things to find. You’ll make memories that stay with you.
Popular Destinations Among New Zealanders
New Zealanders who get to travel to India often want to see the well-known landmarks and top cultural spots. The “Golden Triangle” is a favourite for many, which joins Delhi, Agra, and Jaipur. It takes you to some of the biggest must-see places like the Taj Mahal.
More Kiwis are now also going outside the main areas. Some go through the wide landscapes of Rajasthan, relax in the calm waters of Kerala, or see the spiritual side of Varanasi. The best time to book your trip is from October to March. The weather is not too hot or rainy then. This is a good time for sightseeing and you will enjoy it more.
Popular places and things to do are:
-
The stunning Taj Mahal in Agra.
-
Seeing forts and palaces around Rajasthan.
-
Tiger safaris at Ranthambore or Panna National Park.
-
Watching daily life at the holy ghats in Varanasi.
-
Joining in big festivals, such as Diwali or Holi.
Each part of India gives you something new. So you get a mix of experiences, and new things to see and do on your trip.
Essential Requirements for Travelling
Before you go to India, the first thing to do is make sure all your paperwork is ready. You have to have a valid passport and the right visa. These visa requirements are important to know when you are planning your trip.
You will need to have some required documents for your visa application. You must fill in the visa application form and have these papers to show when you arrive in India. Check that your passport is still valid and have all your documents ready. This will help you avoid any stress before you leave. Now, let’s look closer at these visa requirements and what you need for the application form.
Passport Validity and Regulations
Your passport is the travel document you need most. To enter India, make sure your passport validity lasts at least six months past the date you plan to arrive. Immigration officers will look at this. If your passport does not follow the rule, you may not get in.
When you fill out the application form for your visa, make sure you put in your passport details the right way. You should give your full name, passport number, date of issue, and the expiry date, just as they are on your passport. All personal details on your application form need to be the same as on your passport. This helps to stop any hold-ups in getting your visa.
It is smart to have at least two blank pages in your passport. You will need these for visa stamps and entry or exit stamps. The best time to check your passport is before you travel so you can renew it if you have to.
Key Documents for Entering India
When you want to get your Indian visa, you will have to prepare a few required documents. When you arrive in the country, you also need these papers with you. Having this list of documents ready will help make the visa application and immigration steps much easier.
The main thing you need is your completed visa application form. But, you will be asked for other things, too. The required documents will change a little depending on the type of visa, but most people will be asked for these:
-
A recent passport photo with a white background.
-
A digital copy of your passport’s information page.
-
Proof of your trip plans, such as your flight bookings.
-
A printed copy of your approved eVisa.
When you travel in India, make sure you always have a printed copy of your passport and your visa with you. Keep these separate from the actual original papers for your safety.
Health and Vaccination Recommendations
Taking care of your health is very important if you want to have a safe and good trip to India. It is a good idea to see your doctor or go to a travel health clinic a few weeks before you leave. You can talk with them about the vaccinations and health steps you should take.
You do not need to get any vaccinations to enter India if you are coming from New Zealand. But, some vaccines are strongly recommended so you do not get sick from common illnesses. You also need to take utmost care with what you eat and drink so you do not get a bad stomach. Some health steps you need to follow are:
-
Routine Vaccinations: Make sure all your routine shots like measles-mumps-rubella (MMR) and tetanus are up to date.
-
Recommended Vaccinations: You should think about getting shots for Hepatitis A, Typhoid, and Tetanus.
-
Malaria Prevention: Talk to your doctor about medicine to prevent malaria, depending on where you are travelling in India.
-
Food and Water Safety: Drink only bottled water or use purified water. Eat only fresh and hot food.
If you get ready for your health needs and bring a simple first-aid kit, you will feel much better and safer on your trip.
Indian Visa Options for New Zealand Citizens
As a New Zealand citizen, you can choose from a few types of Indian visa depending on why you want to travel. If you are going for a holiday, the Indian eVisa is the most popular option. The application process is simple, and you can fill out the visa application form online.
If you plan to stay in India for a long time, or your trip is for business or medical treatment, there are other types of visas too. It is important to know the types of visas so you find the right one for your needs. Here, we explain the main visa options and the steps you need to follow for each one.
Types of Visas Available
India offers different types of visas to cater to the varied needs of travellers. For New Zealanders, the most frequently used are the Tourist eVisa, Business eVisa, and Medical eVisa. Each is designed for a specific purpose and has its own validity period and conditions.
The India tourist eVisa is perfect for holidays, sightseeing, and visiting friends or family. The Business eVisa is for those attending meetings or exploring commercial ventures, while the Medical Visa is for individuals seeking medical treatment in India.
Here’s a simple breakdown of the common Indian visa options available online:
|
Visa Type |
Purpose of Visit |
Validity and Stays |
|---|---|---|
|
e-Tourist Visa |
Tourism, recreation, visiting friends/relatives |
30 days, 1 year, or 5 years with multiple entries. Stays limited to 90 days per visit. |
|
e-Business Visa |
Business meetings, sales, setting up ventures |
1 year with multiple entries. Stays limited to 180 days per visit. |
|
e-Medical Visa |
Short-term medical treatment in Indian hospitals |
60 days with triple entry. |
Eligibility Criteria for Each Visa Type
To apply for an Indian visa, you need to meet some simple visa requirements, based on the type of visa you want. The rules for each indian visa are clear, but you have to follow them to get your visa application approved.
If you are looking for a tourist visa, the main rule is that you come for tourism only. You are not allowed to do any kind of work or business. If you want a business visa, you need to share information about the company you will visit in India. If you are applying for a medical visa, be sure to get a letter from the hospital in India where you will get treatment.
If your travel plans do not fit into any eVisa group, you may have to fill out a regular visa application through an Indian office. The application process for a regular visa is longer, so you should look at the latest steps before you start.
Fees and Payment Methods
Paying the right visa fee is an important step in your visa application. India eVisa fees can change based on what kind of visa you want and how long you will stay. The application fee is not returned if your visa is not given to you.
Normally, you pay your visa fee at the end of the application process. The official site takes many payment ways, which helps people from all over the world. The system uses safe online payments to handle the fee. You can pay with these common ways:
-
Credit card (like Visa and Mastercard)
-
Debit card
-
Other online payment options such as PayPal
Be sure to have your debit card or credit card with you when you do your visa application so you can finish it all at once.
How to Apply for an Indian Visa from New Zealand
Applying for an Indian visa from New Zealand is now simple because of the online eVisa system. You can fill out the online eVisa application form at home. Just go to the official government website and use the online eVisa application form.
This new system has made things easy for everyone. You do not need to go to an embassy or consulate for most kinds of travel now. The next parts will help you know what equipment and resources you need. There are also steps on how to do the visa application online for your Indian visa.
Equipment and Resources Needed to Get Started
Before you start your Indian visa application, it is good to get everything set up first. This helps you fill out the online form without any problems. The indian visa application is made to be easy to use, but being ready helps a lot.
You do not need much for this process. All you need is a good internet connection and the required documents in digital form. Unlike old ways to apply for an Indian visa, you do not have to go to an Indian visa centre now. This indian visa application is all done online. Here is what you need:
-
A computer or mobile phone with a strong internet connection.
-
A passport that is still good for at least six more months.
-
A recent digital passport style photo.
-
A copy of your passport’s main information page.
-
A working debit card or credit card for payment.
Having these ready makes your visa application faster and easier.
Step-by-step Guide to Applying Online
The online visa application process for India is made to be easy and quick. If you follow a clear step-by-step guide, you will finish your visa application without worry. Just make sure you fill the application form correctly and get your documents ready to upload.
The whole process, from starting to fill the application to getting your Indian eVisa, is done in a few simple steps. This way, you will not miss any key details. The main steps are:
-
Access the official Indian eVisa portal.
-
Complete the online application form.
-
Upload your photo and passport scan.
-
Pay the visa processing fee online.
-
Receive your eVisa via email.
Let’s go over each of these steps. This is to make sure your visa application will be done in the right way.
Step 1: Access the Official eVisa Portal
The first thing you need to do is go to the Government of India eVisa website. Make sure you do not use any other website. Some other sites are not good, and they could take your money or be unsafe. The only safe site to fill out the online eVisa application form is the official one.
Once you get to the site, you will open a new evisa application form. The website will ask you for basic information first. You will enter your nationality, what kind of passport you have, where you will arrive in India, and your date of birth. When you finish this part, you will get a temporary application ID.
Write this application ID down. You may want to stop and come back later, and with the ID, you can do this. After you finish these first personal details, you can go to the main part of the application form.
Step 2: Complete the Application Form
After you start your visa application, you will be asked to fill in the detailed application form. You need to give a lot of information there, so take your time. Make sure you check all the details to be sure they are right. If you make a mistake, the process can get delayed or your application could be rejected.
The visa application form will ask for your personal information, your contact details, family information, and your passport details. You have to write the information just as it is in your passport. Put in your full name, your date of birth, and where you were born. Your details on the visa application must match the copy of your passport.
You will need to say what your travel plans are. This means where you want to enter the country, the date you want to arrive, and why you are coming. Be honest and clear in your answers. It will help make things move well.
Step 3: Upload Required Documents
After you fill out the application form, you need to upload the required documents. The online portal will ask you to upload a photo of yourself and a copy of your passport’s bio page. You must make sure these files meet the right format and size.
The photograph should be new and show your face from the front with a white background. The website is clear about the size and how big the file can be. You might have to change your photo before you put it up. The copy of your passport must be in colour. It needs to show the page with your photo and your personal details, and must look clear.
Here is a quick list for the document upload step:
-
A digital photograph (JPEG format, between 10 KB and 1 MB).
-
A scanned copy of your passport information page (PDF format, between 10 KB and 300 KB).
-
If you are applying for a business or medical visa, you may have to put up extra documents.
Follow all the steps on the website. This will help make sure your documents get accepted.
Step 4: Pay the Visa Fee
After you upload your documents, you will go to the payment page. Here, you will pay the visa fee. This is the last step for sending in your India eVisa application. You have to pay the India eVisa fees online. Only the payment methods shown will work.
The application fee will depend on what type of visa you need, and the country you are from. You can use a debit card or credit card to pay with the secure payment gateway. Be sure your card is set up for international online payments.
When your payment goes through, you will get a message on the website and by email. This means your India eVisa application will be sent to their team for processing. You must keep your payment receipt and your application ID. This will help you if you need to talk to someone about your eVisa fees later.
Step 5: Receive eVisa Approval and Prepare for Travel
The last thing you need to do is wait for your indian evisa to be approved. The usual processing time is between 24 and 72 hours. Sometimes it can take longer, so it is good to apply about a week before you fly. Once your visa is ready, you will get an email to let you know.
In the email, there will be a link to download your Electronic Travel Authorisation (ETA). You have to print this document. The printed ETA must be shown to immigration officers when you land in India. If you do not have it, you might not get in.
When you have your indian evisa ready, you can look ahead to your next holiday! It is a good idea to keep a digital copy of the ETA on your phone as well, just in case. Now you can relax and start planning all the fun things you will do on your Indian trip.
Booking Flights from New Zealand to India
Once you have your visa sorted, the next thing to do is book your flights from New Zealand to India. This trip takes a long time, so picking the right flights will help make your travel better. If you plan early, you may get better prices and easier trips.
The application process for your visa is different to booking flights. Most people wait until they have their visa before getting tickets. Some tour packages have flights included, which makes things much easier. Now, let’s check out different flight choices and find out how to get the best prices.
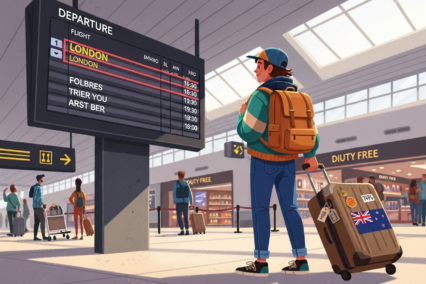
Direct vs Connecting Flight Options
Right now, there are no flights that go straight from New Zealand to India. You will need to have at least one stop on the way. Most flights have a stop in big cities in Southeast Asia or the Middle East. These are places like Singapore, Kuala Lumpur, or Dubai.
How long you stop for can change a lot. Sometimes it’s just a few hours, and other times you might need to stay the night. A short stop means less waiting, but a longer one gives you time to rest or even see a new city for a bit.
When you look at flights with stops, think about the total time it will take, which airlines have a good name, and how nice the stopover airport is. Some travel packages from New Zealand will book all of this for you, so you can just relax and enjoy your trip.
How to Find the Best Airfares
To get the best deal on flights to India, you need to plan ahead and be a bit flexible. The cost of a ticket can change a lot. It depends on things like the time of year, how early you buy, and which airline you pick.
The best time to book is usually a few months before you want to fly. If you leave it to the last minute, you will likely pay a lot more. If you are open with your travel times, you can find cheaper tickets too. Mid-week flights often cost less than those on the weekend. Another easy choice is to go for a tour that has flights included.
Here are some ways to get the best airfares:
-
Book as early as you can, mostly for trips in the busy season.
-
Check out prices on more than one travel website.
-
Shift your trip by a few days if you can.
-
Fly in the off-season (April to September) for cheaper rates.
-
Sign up for updates about fares from airlines who run flights on this route.
Major Airlines Operating the Route
Several big airlines have connecting flights from New Zealand to many cities in India. There are no direct flights yet. But these airlines give good service and have easy stops in their main airports.
When you pick an airline, look at things like how much baggage you can take, how comfy the seats are, and which airport you stop at. Singapore Airlines is well liked because it has good service and smooth changes at Changi Airport. You can also choose other good airlines for the trip.
Some top airlines flying from New Zealand to India are:
-
Singapore Airlines (stops in Singapore)
-
Emirates (stops in Dubai)
-
Qatar Airways (stops in Doha)
-
Malaysia Airlines (stops in Kuala Lumpur)
-
Cathay Pacific (stops in Hong Kong)
If you book with a travel company like Real India Tours NZ, you will often fly with trusted airlines like Singapore Airlines.
Safety and Travel Tips for New Zealanders in India
India is a wonderful place to visit, but you need to put your safety first. Even though most people find it safe, you should always keep an eye on what is happening around you. This will help make your trip enjoyable. Taking small steps can help you not get caught up in things like scams or losing your stuff.
When you think about things like your health or moving around in busy places, knowing a bit before you go helps a lot. These tips will show you how to travel with confidence and always use utmost care for yourself and the things you bring when you travel in India.
Staying Healthy and Safe
Your health and safety are very important when you travel. The way of life in India can be very different from new zealand, so you need to be careful. It is smart to take steps to look after yourself. Watch what you eat and drink. This can help you avoid getting an upset stomach.
You should also think about staying safe, not just with food and water but everywhere you go. When you are in crowded places, you need to keep your things safe. Watch out for scams. If you are a woman, dress in clothes that cover you well. Try not to go out alone at night.
Here are some tips to stay healthy and safe:
-
Drink bottled or clean water only.
-
Eat at places that are known to be good. Choose food that is made fresh.
-
Keep your important things safe and where people can’t see them easily.
-
Use taxis your hotel or tour operator tells you to.
-
Always know what is going on around you, especially at busy markets or when you use public transport.
Practical Advice for First-Time Visitors
For new zealanders going to India for the first time, you will find that there is a lot to see and take in. The vibrant culture is bright and full of life. It can be exciting, but you might feel a bit out of your depth at the start. There are some easy travel tips that will help you get around and enjoy all that this place gives you.
It is good to stay open-minded and have some patience. Things may not happen how you plan, and that is part of what makes travel fun. It helps to know a few basic Hindi words, such as “Namaste” for hello, and “Dhanyavaad” for thank you. Saying these to people can help you get to know the locals.
Here is some useful advice for your first time:
-
Dress in a modest way to show respect for local customs, more so when you visit a place of worship.
-
Always sort out the price with the taxi or auto-rickshaw driver before you get going.
-
It is fine to bargain in markets, but do so in a friendly way.
-
Drink enough water, as some places get very hot.
-
Go for a guided tour if you want a relaxed and easy start to seeing the country.
Packing Checklist and Pre-Travel Preparation
Getting your packing and plans done well is the last thing before you start your trip. A good packing list helps make sure you have all you need for a nice and easy time, like the right clothes and any required documents.
For New Zealanders going to India, it’s important to pack for the weather and to think about local ways of dressing. Along with filling your suitcase, you must also have copies of your passport, visa, and other important papers ready. Let’s see what you need to pack and get ready.
Must-have Items for India
When you put together your packing checklist for India, think about being comfortable, staying practical, and making sure what you wear is right for local culture. The weather can get hot, so light and loose clothes are very important, especially in summer. It is also a good idea to pack things you can layer when it gets cool at night or during a trip up into the hills.
The things you bring besides clothes matter too. There are a few items that will help your trip go well. Pack a small first-aid kit, something to keep the bugs away, and a travel adapter that works everywhere. You should also have all your travel papers ready, and be sure to take copies with you.
Here’s a list of essential items to pack:
-
Lightweight, loose-fitting clothing (cotton and linen are great).
-
A scarf or shawl for covering your head at religious sites.
-
Comfortable walking shoes.
-
Hand sanitiser and wet wipes.
-
A basic medical kit with any personal medications, pain relief, and stomach remedies.
-
Proof of travel insurance.
Mobile Connectivity and SIM Cards
Staying connected when you travel in India can be easy and does not have to cost a lot. You have two main choices. You can use international roaming with your New Zealand phone company, or you can buy a local SIM card when you get there. Most people find it is cheaper to get a local SIM for both calls and data.
If you want a local SIM card, you will need to show a copy of your passport, your visa, and give a passport photo. You can buy a SIM card at the airport or at the main shops of top phone companies like Airtel, Jio, or Vodafone Idea. With a local SIM, you can use local apps to book transport or order food.
Here are some ways you can connect:
-
International Roaming: Ask your New Zealand provider about the cost before you travel.
-
Local SIM Card: You can buy one at the airport. This is a simple way to get started.
-
eSIM: If your phone works with eSIM, this can be a good and easy choice.
-
Wi-Fi: You will find this in most hotels and a lot of cafes. But a SIM card helps you stay online everywhere.
Having a local number will help you keep in touch with drivers, guides, and hotels without any trouble.
Travel Insurance Considerations
Travel insurance is something you should always have before you go to India. It gives a safety net if things go wrong, like if you get sick or need to cancel your trip. Taking utmost care to choose the right policy will help you feel calm during your holiday.
When you look for insurance, check that it will pay for hospital bills, getting you out in an emergency, any bags or things you lose, and flight problems. Make sure to read the paperwork well. Know what is and what is not paid for, more so if you want to do things like outdoor sports.
Key things to look for in travel insurance include:
-
Medical Coverage: See if the amount is enough to pay hospital costs.
-
Theft and Loss: Look at how it covers your things, like your camera or laptop.
-
Cancellation Cover: This comes in handy if you need to cancel your travel because of a problem.
-
24/7 Assistance: Good insurance will let you call them any time if you need help.
Do not leave for your trip without travel insurance. It is not much money for a lot of help and peace of mind.
Money Matters and Managing Finances in India
Taking care of your money is very important if you want your trip in India to go well. You use the Indian Rupee (INR) there. It helps to have both cash and cards for paying. If you know about currency exchange, where to use ATMs, and how to use online payments, you can handle your money better.
Big hotels and most good restaurants take cards, but you still need cash for small shops, markets, or getting around town. It’s smart to plan how you will get your money before you land. Now, let’s look at the best ways you can manage your money in India.
Currency Exchange and ATM Access
If you are from New Zealand and you are going to India, it is a good idea to take some Indian Rupees with you. This is handy for the first set of things you might need when you land. You can get a bit of currency changed before you leave New Zealand. Or, you can change money at the airport when you get to India. If you want a better deal, use the official money exchange shops in the big cities, not at the airport.
You will find plenty of ATMs in most cities and towns in India. ATMs make it easy to get cash whenever you need it. The good thing is that most ATMs will take international cards from banks in New Zealand. Let your bank know you will be going to India before you leave. This way, they do not stop your card, thinking someone else is trying to use it.
Here are some tips for using money and ATMs:
-
Exchange your money at a bank or with dealers who are allowed to do it.
-
It is safer to use ATMs that are inside or close to the banks.
-
Take out larger amounts of money each time, so you pay lower fees.
-
Keep some cash with you at all times, for small daily things.
Using NZD Debit/Credit Cards
You can use your New Zealand debit and credit cards at many places in India, mostly in cities. Big hotels, fancy restaurants, and large shops often take Visa and Mastercard. This makes it easy and safe to pay for bigger things.
Before you go from New Zealand to India, ask your bank about any fees they charge for card payments in other countries. Some cards work better for travel and have lower fees. Tell your bank when you will travel. This helps stop your card from getting blocked if they think the charges are not normal.
Always bring more than one card with you as a backup. You may need it if one card gets lost, stolen, or does not work. When you pay with a card, you may get asked if you want to pay in NZD or INR. It is usually better to pick INR, so you get a good exchange rate from your bank.
Digital Payments and Local Apps
India’s digital payment scene is growing fast. You will see QR code payments everywhere, even at small street food stalls. Many popular apps like Paytm or Google Pay (India) ask for an Indian bank account and phone number. But they are starting to open up and let more visitors from other countries use them.
If you are a tourist, you might find it hard to get these apps set up. Still, the situation may change soon, so keep an eye out for news because these systems are being improved to help travellers from overseas. Right now, it’s a good idea to use your international debit card or credit card and keep some cash with you.
Here are some simple points about digital payments:
-
Major ride-sharing apps like Uber let you use your international debit card or credit card.
-
Some services made for tourists might accept payments from other countries.
-
The Unified Payments Interface (UPI) is the most common way to pay, but it is mainly used by local people.
-
Always carry cash as a safe backup in case you cannot use digital payment options.
Best Time of Year to Visit India
Picking the best time to go to India depends on where you want to go and what you want to do there. The country is big, and different areas get different weather at the same time of year.
Most people say the best time to visit India is in the winter, from October to March. During these months, the weather is nice and dry in most places. You can enjoy being outside and see a lot during this time. Let’s see what the weather is like and what times in the year are good for visiting.
Climate and Weather Patterns
India has three main seasons: winter, summer, and the monsoon. Knowing how the weather changes can help you pick the best time for your trip. Winter lasts from October to March. It is cool and nice, so many people visit India at this time.
Summer is from April to June. It can be very hot in most places, especially in the north and Rajasthan. After summer, the monsoon comes from June to September. There is a lot of rain during this time but it happens more in some places than others.
There is a different climate in the Himalayas. Summers are cool and winters get lots of snow. In the south, it is warmer and more humid, and the weather stays mostly the same all year.
Recommended Seasons for Travel
For most New Zealanders, the best time to travel to India is during winter. The weather is good at this time and you can see many places. You can visit old buildings in the north or go to the beaches in the south.
Winter is a busy season, but there are other good times to go. October, November, February, and March are nice because there are not as many visitors. The weather is still good in these months. If you travel in summer or when it rains, you can get cheaper prices. The land looks green when it rains. There are also some special travel deals in these months.
Recommended seasons for different regions:
-
Northern Plains (Delhi, Agra, Rajasthan): October to March.
-
Southern India (Kerala, Tamil Nadu): September to March.
-
Himalayas: March to June if you want to go trekking and see the sights.
-
Off-Season Deals: July, August, and September have big discounts.
Major Festivals and Events
Taking part in one of India’s big festivals is a great way to jump into its vibrant culture. You will see colour all around, hear lots of music, and enjoy old traditions. Planning your trip to match a festival can be the best part of your time there.
Most festivals in India do not fall on the same day each year. The dates follow the moon’s calendar, so they move every year. It is smart to check the dates before you make plans if you want to join in. There is always something special to see in India, from the festival of lights to Holi, which is famous for its burst of colour.
Some major festivals to see:
-
Diwali (October/November): The festival of lights. People light lamps, set off fireworks, and share sweets.
-
Holi (March): This is the festival of colours. People throw coloured powder and water and have lots of fun together.
-
Pushkar Camel Fair (November): It is a huge old-style fair held in Rajasthan.
-
Ganesh Chaturthi (August/September): A big festival, mostly in Mumbai, where people honour Lord Ganesha.
Top Tours and Experiences for New Zealanders
India has many different tours and things to do. You can find everything from cheap trips for backpackers to fancy travel for those who want something special. Many New Zealanders choose guided tours because you get to see all the important places, and you do not have to worry about making all the plans.
You can join a small group trip or book a private tour just for you. There is something for every style. If you want the best comfort, luxury tours are perfect. They give you top service and make you feel special, almost like royalty. Here are some of the best choices you can pick from.
Guided Tours and Packages
For New Zealanders who want an easy and smooth way to travel in India, guided tours are a great option. These tours often handle everything for you. This includes things like your flights, getting your visa, staying places, getting around, and seeing sights. You can just relax and enjoy your time there.
Real India Tours NZ gives the option for private or small group tours. They show you real places and everyday life in India. There are trips that go to rural Rajasthan or let you see temples down south. You can pick a tour based on what you like most. The application process for visas is often part of what you get when you book your tour.
Popular guided tours are:
-
Opulence Tour of India: This is a 16-day luxury trip around Rajasthan.
-
Temples, Train & Tigers of India: Spend 15 days travelling through Central India.
-
The Complete South India Tour: Go on a 16-day journey through Kerala and Tamil Nadu.
-
Golden Triangle with Tiger Safari: See main sights on this 11-day tour.
Luxury Travel Options
For people from New Zealand who want the best travel, India has a lot of choices for luxury trips. You can see the country while staying in grand palace hotels, small but special places, and fancy tent camps. These tours bring a new level of comfort and style.
Companies like Real India Tours NZ are just for travellers who want luxury. They make sure your whole trip is top quality. You can stay in well-known hotels like Oberoi and Taj Palaces. You get to travel in luxury vehicles, and you also join unique local activities. The company can even handle your visa application and make the whole visa application process easy for you.
These top-end experiences can include:
-
Sleeping at a fort from the 1200s that is now a special hotel.
-
Having a private dinner next to a historic stepwell.
-
Going on leopard safaris, then relaxing with a spa at a resort.
-
Resting in 5-star heritage hotels and high-end homestays.
-
Enjoying a special anniversary deal that gives you a free upgrade to the Taj Lake Palace in Udaipur.
Must-see Sights and Attractions
India has a lot to see and do. This place is full of great sights and places that show the country’s long history and vibrant culture. You can find amazing buildings and natural spots that are sure to catch your eye. There are so many things to see that you could visit new spots each time you go. To make your trip special, you should make time to see some of India’s best-known landmarks.
The Taj Mahal is the most well-known place in India. People from all over the world come here. It is a place built for love, and its beauty is famous everywhere. But India is not just about the Taj Mahal. The rest of the country is full of things to do and see as well. Every place in India has something different to give you and will add to your trip.
Here are some great places you should try to see on your trip:
-
The Taj Mahal, Agra: This is a UNESCO World Heritage site and shows what India is all about.
-
The Forts of Rajasthan: Walk through the big forts in Jaipur, Jodhpur, and Udaipur.
-
Varanasi Ghats: See old rituals on the holy River Ganges.
-
Kerala Backwaters: Float along calm waters in a houseboat that looks like something from a story.
-
Temples of Khajuraho: Look at the small and lovely carvings on these famous temples.
Conclusion
In the end, New Zealanders who want to travel to India can enjoy a vibrant culture and see stunning places like the Taj Mahal. The visa application process is easy if you do the right preparation. Make sure you fill in the application form the right way and have all the required documents. When you do this, getting an Indian visa can be simple. Keep an eye on the processing times and visa fees so your next holiday goes well. With a bit of planning, you can look forward to a great adventure in India!
Frequently Asked Questions
What visa requirements do New Zealanders need to travel to India?
New Zealanders who want to go to India need to have a valid passport and an e-Visa. You can get an e-Visa online for tourism, business, or medical reasons. Make sure you apply for the e-Visa at least four days before your trip. Also, check how long the e-Visa will be good for and that it will cover your whole stay.
Are there direct flights from New Zealand to India?
Right now, you can’t get a direct flight from New Zealand to India. But you can take connecting flights with stops at big airports like Melbourne, Sydney, or Singapore. This gives you more ways to travel and makes it easier to plan your trip from New Zealand to India.
Is it safe to travel to India as a New Zealander?
Travelling to India if you are from New Zealand is usually safe, as long as you take normal steps to stay safe. It is good to keep up with local ways of living, health news, and any rules to travel. When you are in crowded spots, watch out and make sure to look after your things. This will help keep you safe during your time there.
What documents do I need for traveling from New Zealand to India?
To go from New Zealand to India, you need to have a valid passport and an Indian visa. You may also need vaccination papers. It’s good to take copies of your travel plan and your travel insurance. This can help make your trip easier. Make sure all your papers are up-to-date before you leave.