Key Highlights
Thinking about going to Norway? Here is what you need to know about the visa application process.
-
If you are a Canadian citizen, you can visit Norway and the Schengen area for up to 90 days without a visa, if you are there for tourism.
-
If you plan to stay longer than 90 days, or want to work or study, you will need a residence permit.
-
The main visa types include the Schengen visitor visa, work permits, and study permits.
-
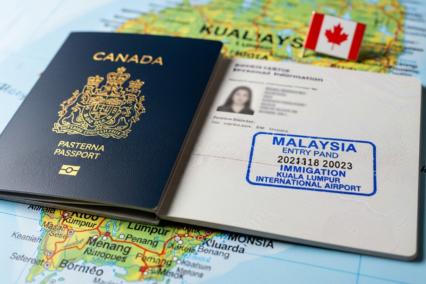
The application process for a Norway Schengen visa usually begins online using the UDI portal.
-
You must have some essential documents. This includes a valid passport, proof of accommodation, and travel health insurance.
-
The processing time for your visa application can take up to 45 days after the consulate gets it.
Introduction
Do you want to see Norway’s lovely fjords and lively cities? If you are from Canada, it is easy to travel to this amazing Scandinavian place. Still, the length and reason for your visit might mean you need a visa. Below, this guide will help you with the Norway visa application for Canadians. You will get the main points about the application process. You will find out when you need a visa and what documents to get ready. This way, you can be prepared for your trip to the Schengen area.
Understanding Norway’s Visa Policy for Canadians
For Canadian citizens, Norway follows rules set by the Schengen Area. This makes it easy to travel, as you do not need a visa for short visits. You can come into Norway without needing to fill out a visa application form if you plan to be there for a short trip.
But, if you want to stay longer, like for work or school, you must go through Norwegian authorities. You will need to fill out a visa application form and follow their process. The steps for getting a long-term visa are clear, and it is good to know these rules before you go.
Visa-Free Entry and Short Stay Rules
As a Canadian citizen with a Canadian passport, you can visit Norway and any other country in the Schengen Zone without getting a visa. You get to be there for up to 90 days in any 180-day stretch. This works well for travel, seeing family, or if you have a short work trip. You can check out places in the Schengen countries without worry or needing more papers.
Your passport will be your main travel document for getting this entry. When you get there, someone may ask to see that you have enough money, your plan for your trip, and a ticket to fly home. You should keep in mind, the 90 days is the total for all your time spent in the Schengen zone. It’s not just about time in Norway.
If you decide to stay in Norway for even longer, more than three months under special rules (though most tourists don’t do this), you would later have to check in with the local police. Always plan your trip to stay within the 90 days, in any 180-day window, so you don’t run into problems.
Situations Where Canadians Need a Visa
Short trips to Norway for tourism do not need a visa. Still, there are times you, as a Canadian, will have to get a visa or permit before you travel. This is true if you plan to stay more than 90 days, or if your visit is about something other than tourism.
The Norwegian Directorate of Immigration (UDI) looks after these applications. If you want to live, work, or study in Norway, you need the right permission for that. You can’t just go over as a tourist and start working or sign up for school right away.
You need to apply for a residence permit if you want to:
-
Work in Norway. You will need a work visa for this.
-
Study at a Norwegian school for more than three months.
-
Join family members who already live in Norway.
When you do get a long-term permit and arrive in Norway, you also need to sign up with the National Population Register.
Main Types of Visas for Norway
Norway has a few kinds of visas and permits based on why you want to go there. The two main types are short-stay visas and long-term residence permits. People from Canada don’t need a Schengen visa if they just want to visit for fun. But many people from other countries still need this kind of visa, and it’s an important part of getting into Norway.
If you are Canadian, you only need to think about long-term stays. So, if you want to work, study, or live there, you’ll have to get a residence permit. This could be a work permit or study permit. You do this by filling out an application form. Let’s look at some of these options more closely.
Schengen Visitor Visa (Tourist Visa)
The Schengen Visitor Visa, you may hear it called a tourist visa, lets you go into Norway and other countries in the Schengen area for up to 90 days in a 180-day period. If you have Canadian citizenship, you do not have to fill out an application form for this visa if your trip is short and just for tourism. This visa-free option makes it much easier to visit for a holiday.
But, if you are from a place that needs a visa for the Schengen area, you have to fill out a long application form. You will need to send this to the Norwegian embassy or to the visa centre in the country where you live.
Your application form should say which Schengen country is your main destination. If Norway is where you plan to go for most of your visit, or if the purpose of your stay is there, you have to apply through Norway, which means going through the Norwegian embassy or their set channels. If you cannot pick one main destination among the Schengen countries, you should apply to the country you first enter.
Work Permits and Employment Visas
If you want to work in Norway, you cannot work with a visitor’s visa or use the visa-free rules. You must get a work permit, which is also called a residence permit for work. The main type is for a skilled worker. For this, you need a job offer from a Norwegian employer.
There are some steps in the application process for a skilled worker permit. You must have the right qualifications for the job. The job offer must also give you pay and work terms that fit with what they use in Norway. Often, your employer in Norway can start the application process for you.
It is important to get the residence permit before you begin work. This lets you be legally employed and have the same rights as Norwegian citizens at work. There are other types of work permits too, like for people who want to be self-employed. Each an has their own tough set of rules to follow.
Student and Study Visas
Do you want to study in Norway? If you plan to take a program that will last more than 90 days, you will need to get a study permit. This permit lets you stay in Norway for your studies. It also lets you work part-time for up to 20 hours each week while school is in session.
To get a study permit, you have to be accepted to a full-time program at a college or university in Norway that is accredited. You must also show that you have enough money for your living costs. Right now, this amount is NOK 13,790 for each month. You need valid health insurance as well.
You should send your visa application to the Norwegian authorities before you plan to travel there. Having a study permit does not mean your family member can come without taking any other steps. They will need to apply for a permit of their own, often under family rules.
Norway Visa Requirements for Canadians
Most people from Canada can travel without a visa if it is just for a short visit, but you still need to meet some entry rules. The most important thing you will need is a valid passport. If you plan to stay longer and need a residence permit, the visa requirements get more focused. The paperwork changes based on why you want to stay.
You will have to give different documents. These include proof for why you want to stay, showing you have enough money, and having enough health insurance. Knowing the money rules and bringing the right papers is key if you want your application to work out. Here is what you will need:
Essential Documents Checklist
When you apply for a residence permit for Norway, getting the right documents is the key step. If you send in complete and clear forms, you can avoid delays. You need to bring all these papers with you when you go to the visa application center.
The documents you need depend on the type of permit, but most people need to provide a few basic things. The first part of your application is filling out the online application form and getting a cover letter from the UDI portal.
Here are the items you need to get ready:
-
A printout of your finished application form.
-
A valid passport, which should be good for at least three months after you plan to leave the Schengen area.
-
A passport photo that fits the rules.
-
Proof that you have a place to stay in Norway.
-
Papers that show why you are coming, like an employment contract or a letter from a university.
-
Proof you have proper travel insurance.
You must collect these documents before your appointment at the application center. This helps you get your residence permit faster and makes sure the process goes well.
Health Insurance and Financial Requirements
If you are going to Norway, you need to have health insurance. This is true whether you go with a visa or as a tourist who does not need a visa. It is important to have enough insurance because the country wants you to pay for any medical costs yourself. This helps keep the Norwegian healthcare system safe and free from extra cost.
When you make a visa application, you must show proof of travel insurance. This insurance has to be valid in the whole Schengen area. Your medical insurance must cover at least EUR 30,000. The insurance needs to help pay for emergency medical treatment, hospital stays, and repatriation if needed. All of this should also be covered if death happens.
You also must show you have enough money for your time in the country. This means you need to show proof that you can support yourself. If you ask for a study permit, there is a set amount you need for each month. For other permits, you may show bank statements, a letter that says what you get paid by your employer, or a guarantee form from someone in Norway.
Step-by-Step Guide to Applying for a Norway Visa
The process to get a Norwegian residence permit starts online. You need to go to the official Norwegian Directorate of Immigration (UDI) application portal. Here, you fill out the form for your residence permit and pay the fee.
Once you finish this part online, you must do the rest in person. You need to book a time at a visa application center. In Canada, VFS Global runs these centers. When you get there, you give your documents and your biometric data.
This guide will help you understand every part of the residence permit application process. It will cover steps at the application portal, how to choose the right application center, and what will happen at VFS Global.
Online Application Process Explained
The journey to get your Norwegian visa begins on the UDI website. This is the main application portal where you will start and handle the most important part of your application process. If this is your first time, you need to make a user account.
When you are signed in, you will pick the right permit type. You then fill out the application form with your details and all information about your trip. When you finish the form, you pay the application fee right on the portal. You will get an email that confirms your payment and has your form and receipt attached.
The online application process includes these main steps:
-
Create a user account on the UDI application portal.
-
Fill out the online application form with correct information.
-
Pay your application fee on the portal.
-
Print the cover letter and a copy of your application form to take with you to your meeting.
You cannot get status updates on your specific case from the consulate, so it is important to follow all the steps and instructions given.
Submission, Interview, and Biometrics
After you sign up for your application online, the next thing you need to do is go to a visa application center in person. In Canada, these centers are run by VFS Global. You will have to book a time to bring your printed application form, passport, and all other papers needed for your residence permit and visa application.
At your appointment, you will give your biometrics. This means you have your fingerprints scanned and a digital photo taken. Your fingerprints will be kept and can be used again if you apply within the next 59 months. If the Norwegian Consulate General in New York, which handles applications from Canada, can’t find your old biometrics, you may have to come back and give them again.
For a residence permit application, there is not usually a formal interview. Still, you must hand in all documents and biometrics as part of the visa application at the application center. After you give everything, VFS Global will send your whole package to the consulate general for their review. When you get to Norway on a long-term permit, you also have to sign up with the local police.
Processing Times, Costs, and Common Concerns
Knowing how things work with your application will help you have a smooth time. You should be aware of the visa fee, how long the processing time may take, and what to do if you get a rejection letter. These things can change the way you plan your trip and your budget.
Processing time might be different for each person. Costs will change based on the type of permit you want. If your application is not accepted, you will get a rejection letter. This letter will be sent by either the consulate or the directorate of immigration (UDI). It will tell you how to appeal. Let’s take a closer look at these points.
Norway Visa Fees and Payment Methods
The cost of a Norwegian visa or permit varies significantly depending on the type you are applying for. The main visa fee is paid online through the application portal when you register your case. Certain applicants, such as children under six or family members of EU/EEA citizens, may be exempt from this fee.
In addition to the primary application fee, you must also pay a service fee to the external service provider, VFS Global. This fee covers the cost of their services, including application submission and biometric collection. Optional services, like courier return of your passport, are also available for an additional charge. All fees must be paid as part of the application process.
Here is an example of some common permit fees (note that fees are set in Euros or Norwegian Kroner and can fluctuate):
|
Permit Type |
Fee (approximate) |
|---|---|
|
Work Permit |
NOK 6,300 |
|
Study Permit (over 18) |
NOK 5,400 |
|
Family Reunification |
NOK 11,900 |
|
Permanent Residence |
NOK 4,000 |
How Long It Takes & What to Expect
The processing time for a Norwegian visa changes based on where you apply. If your application is handled at the Norwegian Consulate General in New York, you will usually get a decision in about 15 calendar days after your application comes from VFS. Still, you need to think about the extra courier time, as this can add a few days each way.
If your case is more complex, or your application needs to go to the Directorate of Immigration (UDI) in Norway, the processing time can be up to 45 calendar days. The application process will take longer if you do not send all the paperwork they ask for. It is best to apply at least four weeks before the date you want to travel.
While your application is being processed, you cannot get detailed status updates from the consulate general. When a decision is made, you will get an email or phone call. If your application is not approved, you will get a rejection letter. This letter will tell you the reason and explain how to appeal if you want to.
Conclusion
To sum up, knowing the visa steps for Norway is important for Canadians who want to visit, work, or study there. We talked about the differences between coming in without a visa and the types of visas you may need. We also went over what paperwork you have to get ready. If you follow the steps in this blog, you will make things easier for yourself. Make sure you have all the things you need before you start. This will help you have a better time.
If you still do not know what to do or want someone to help you, you can ask for a free consultation. This way, you will get answers that fit you. Safe travels, and enjoy your time in Norway!
Frequently Asked Questions
Can I work or study in Norway on a visitor visa?
No, you cannot work or study in Norway if you have a visitor’s visa or are staying without a visa. You need a work visa or a study permit to do that. You have to finish the visa application and get approval from Norwegian authorities before starting any work or studies.
Where can I find the latest official updates and travel advice for Norway?
The best place to get official details is the Norwegian Directorate of Immigration (UDI) website. You can find the most recent rules, forms, and status updates there. If you need help with how or where to send your visa application, check the website of the visa application center, VFS Global, or the Royal Norwegian Embassy in your area.
Is it possible to extend my stay or change visa types while in Norway?
It is not common to get more time on a short stay. If things change and you want to be here for another reason, like going from being a student to getting a job, you will need to send a new application for a residence permit. Most of the time, you have to do this from your home country.