
Key Highlights
Here is a quick look at what we’ll cover in this guide for your Indian visa.
-
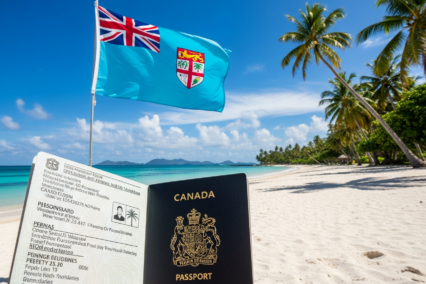
The Government of India has many visa types. These include the tourist visa and the easy-to-use e-Visa.
-
Canadian travellers need to meet the rules for each visa type.
-
The Indian e-Visa lets you do the visa application all online.
-
Most visa applications need your fingerprint or a photo. You may have to go in person to apply.
-
Processing times for visa applications are not the same for all. It is good to apply long before your trip.
Introduction
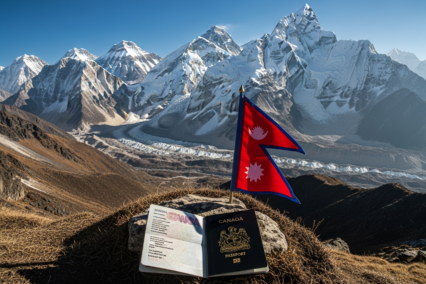
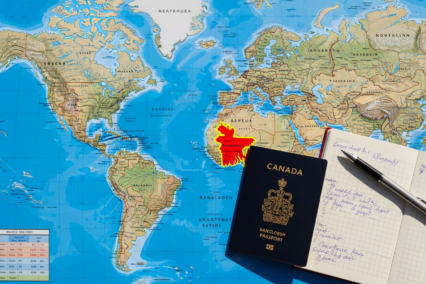
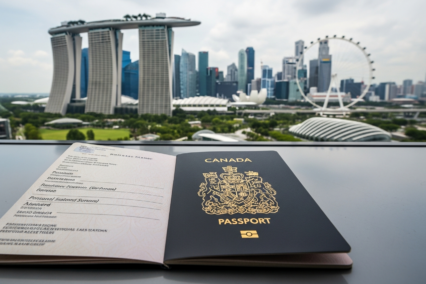
Are you planning a trip to India? That is really exciting. Whether you want to see old palaces, walk through busy markets, or relax in beautiful places, your trip starts with getting the right Indian visa. If you are from Canada, it might look a bit confusing to get the right visa. This guide is here to help you with all these steps. We will talk about what you need to know, like the tourist visa, and show you how to send in your application. This way, your journey to India can be easy and stress-free.
Overview of Indian Visa Requirements for Canadians
If you are from Canada, you must have a valid visa before you go to India. The Indian government sets some rules for visas, and what you need depends on why you travel. You have to pick the right visa type. For example, there is an entry visa if you want to see family, or a tourist visa if you want to tour around. Then, you need to fill out the right application form.
First, it is good to know these rules before you do anything. All Canadian people, even those of Indian origin, should use the process made by the Government of India and the Indian Mission in Canada. This page will help you know the basic rules, learn some terms, and understand what India’s rules are for those who can visit without a visa.
Eligibility criteria for Canadian travellers
To get an Indian visa, you must first meet some basic rules. All Canadian nationals who want to go to India for any reason, like tourism, business, or to see family, need to get a visa before they travel. This rule is for all passport holders, no matter their age.
Visa applicants have to show a real Canadian passport. Persons of Indian origin who are now Canadian citizens may see some different rules. If you have dual nationality, you have to say so on your visa application. This can help you avoid a delay in getting your visa. Here are the main rules you must follow:
-
Holding a valid Canadian passport.
-
Having a clear reason for your visit that fits a certain visa type.
-
Not having any past trouble with Indian visas or with the Indian authorities.
It is important for all indian visa applicants to meet these rules. Make sure that everything in your form is true and right before you send it.
Key terms and definitions related to Indian visas
Getting to know some key words will help you understand the Indian visa process. When you fill out the application form, you will see some special words. It is important to know what they mean. These words show the rules and limits for your travel rights.
The Bureau of Immigration controls who can come in and go out at the borders of India. They will check your Indian visa when you arrive. It helps to know what each word means, so you can ask for the right visa and use it the right way. Some terms you may see are:
-
Visa Type: This tells you the reason for your trip, like for fun, business, or medical treatment.
-
Validity of the Visa: This shows how long you can enter India, which starts from the date you get your visa, not your date of travel.
-
Application Form: This is the paper you fill in with your name and trip details.
-
Entry: This is about how many times you can come into India on one visa. It may be single entry, double entry, or even more than that.
Visa-free and visa-on-arrival policies
If you are a Canadian traveller, you need to know that India does not let you enter without a visa. India also does not let you get a visa after you arrive. You have to get your visa before you go. If you try to enter India without a visa, you will not be allowed in.
The Indian government wants all Canadian nationals to get either a regular visa, which is a sticker in your passport, or an electronic visa, called an e-Visa. With an e-Visa, you can apply online. The e-Visa is not the same as getting a visa when you land. It is a pre-okay but not a visa-on-arrival.
Here is a summary of India’s visa rules for Canadian passport holders:
-
Visa-Free Travel: This is not possible for Canadian passport holders.
-
Visa-on-Arrival: This is not possible for Canadian passport holders.
-
Required Visa: You must get a regular visa or an electronic visa before you leave.
It is good to plan early and apply for your visa before your trip to stop any travel trouble.
Types of Indian Visas for Canadian Citizens
India has many visa types, and each fits a different reason for travel. If you are a Canadian citizen, you must pick the visa type that matches what you want to do. The most common are the tourist visa for holidays and the business visa for work or deals. Other visa types are for medical treatment, jobs, or study.
You need to pick the right visa type. If you do things your visa does not allow, you may face trouble. For example, you cannot work or do business with a tourist visa. In this part, we talk about the e-Tourist visa, business visa, and other visas. These include medical, student, and conference visas too.
e-Tourist visa options
Yes, you can get an Indian tourist visa online with the e-Tourist visa system. This electronic visa is a good choice for Canadians who want to take short trips. You can use it for fun, travel, or to visit friends and family. You do not need to go to the consulate for your first application.
The e-Tourist visa comes with a few choices. You can pick what fits your travel plans. There are different visa types, with different validity of the visa and how many times you can enter.
The validity of the visa starts on the day you get it. It does not start when you go into India. So, it is good to plan your time and apply when you need.
Here are the common e-Tourist visa options:
-
30-Day e-Tourist Visa: This gives you double entry, and it lasts 30 days from when you get it.
-
1-Year e-Tourist Visa: You can go in and out many times during one year.
-
5-Year e-Tourist Visa: This gives multiple entries for up to five years.
Please know this electronic visa can not be made longer. Also, you can not change the visa type when you are in India.
Business visa categories
If you are going to India for any business work, you need a business visa. This visa is for travellers who take part in business meetings, search for business chances, join trade fairs, or buy and sell things. This be different from an employment visa. An employment visa is only for those who have a job in India.
Canadian citizens who want a business visa must show proof of their business in India. You can use an invitation letter from an Indian company. You submit your application to the right indian mission in Canada. If you are just going to a conference or seminar, you should apply for a conference visa instead.
The business visa lets you do these things:
-
Attend business meetings and talk about technical ideas.
-
Join exhibitions and trade fairs.
-
Make deals and start business plans.
Make sure that all the work you do in India matches the rules of your business visa.
Medical and medical attendant visas
If you want to get medical treatment in India, you will need a medical visa. This type of visa lets you be in India for treatment in hospitals or centres that are known and trusted. The validity of the visa is for up to one year or until your treatment ends, whichever time is shorter.
You can take up to two family members with you. They can apply for a medical attendant visa. These must be your close family like your spouse or your kids. The required documents for both the medical visa and the attendant visa will include a letter from an Indian hospital. This letter must confirm your appointment and talk about your medical condition.
For the medical visa, you will usually need:
-
Proof of your medical condition from your doctor in Canada.
-
An official letter from the hospital you will go to in India.
-
Proof you have enough money for your treatment and to stay there.
This set of rules and required documents is there so your trip to India is only for medical care. The validity of the visa helps to make sure you are there to get well.
Student and research visas
If you want to study or do research in India, you will need to get a student visa or a research visa. These visas let you stay for a long time, and you have to meet certain rules before the Indian Mission says yes.
A student visa is for people who are taking a full-time course at a school that is recognized in India. You will need to give a letter from the school that says you got accepted when you apply. The validity of the visa is matched to how long your course lasts, but it can be for up to five years.
If you need a research visa, you must show:
-
An acceptance letter from a recognized Indian university or school.
-
A clear outline of what your research will be.
-
Proof that you have money to pay for your stay in India.
Both visas are not for short-term courses. If you want to take a short course, you may need a tourist visa.
Conference, journalistic, and religious visas
India gives special visas for certain work or personal reasons. There is a conference visa, journalist visa, and religious visa. Each one has its own rules and way of applying. You must pick the right one, so you follow the Indian government rules.
A conference visa be for people who want to go to events like international conferences, seminars, or workshops in India. A journalist visa is needed for anyone who is a pro journalist, photographer, or filmmaker. You need this visa no matter why you come to India. A religious visa is for those who do religious work or need to study religion.
When you fill out the application form for any of these visas, here is what you need:
-
Conference Visa: You need an invite from the person running the event, and you need to get okays from Indian ministries.
-
Journalist Visa: You must give details about your media group and share what kind of work you will do in India.
-
Religious Visa: You need a letter from a well-known religious place in India inviting you.
Getting each visa means you need to be ready and bring certain papers with you. It helps you get approved by the Indian government.
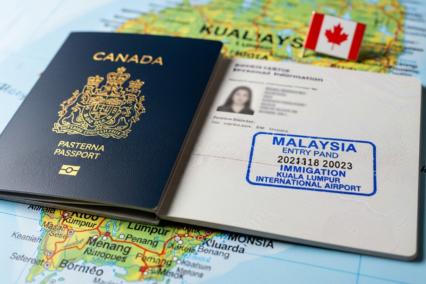
What is an Indian e-Visa?
The Indian e-Visa is a type of electronic travel authorization. It lets people from countries that can use it, like Canada, go to India for a short stay. You can use the e-Visa for tourism, business, medical treatment, or to attend meetings and conferences. The process for the indian visa is now online. You do not have to mail your passport or your original papers to the office or consulate. You only have to fill in a form and send your documents online.
The indian government makes sure this system works to save both time and effort. After you finish your application online and it gets approved, you will get an email with your Electronic Travel Authorization, or ETA. Print this ETA. You need to bring this printout with you and show it to immigration officers when you get to India. The next section will explain what else is important about this e-Visa, how it is not the same as a regular visa, and how long the e-Visa will be good for.
Features of the e-Visa system
The Indian e-Visa system has many things that make people want to use it. One big advantage is that you can fill out the whole application online at home. This electronic visa is easy to use and saves time.
When you get to India, you need to show your printed e-Visa confirmation to officers from the bureau of immigration at e-Visa counters. The officer will put a stamp in your passport for your visa. The validity of the visa and how many times you can enter India depend on the type of e-Visa you pick.
Key features of the e-Visa include:
-
A completely digital online application process.
-
No need to send your passport anywhere.
-
You get your visa faster than with many regular visas.
-
Different types to choose from, like e-Tourist, e-Business, and e-Medical.
These things make the electronic visa a good choice for many Canadian people.
Differences between e-Visa and regular visa
While both the e-Visa and a regular visa grant you entry into India, there are significant differences in the application process, validity, and usage. The most notable distinction is how you apply. An e-Visa application is done entirely online, whereas a regular visa requires submitting your passport and application form to an Indian Mission.
A regular visa is a sticker or stamp placed in your passport before you travel, while an e-Visa is an electronic authorization you print and carry. Regular visas often offer longer validity periods and more flexibility for certain travel purposes, such as long-term employment or study.
Here is a simple comparison:
|
Feature |
e-Visa |
Regular Visa |
|---|---|---|
|
Application Process |
Fully online |
In-person or by mail at an Indian Mission |
|
Document Submission |
Digital uploads |
Physical documents and passport |
|
Visa Format |
Electronic Travel Authorization (ETA) printout |
Sticker/stamp in your passport |
|
Validity of the Visa |
Shorter-term (e.g., 30 days, 1 year, 5 years) |
Can be longer-term (e.g., up to 10 years) |
Choosing between them depends on your travel needs and how far in advance you are planning.
Duration and validity of the e-Visa
The time that you have on your Indian e-Visa depends on which one you pick. It’s important to know how the validity of the visa works to help plan your visit well. The validity period for an e-Visa starts the day it is granted, not when you land in India.
For example, the 30-day e-Tourist visa lets you come into India twice within a 30-day window that starts from your first time you enter the country. A 1-year or 5-year e-Tourist visa means you can make multiple trips in and out, but you can’t stay more than 90 days at once each time you come in. If you have a single entry visa, you can enter just one time.
The main validity options for entry visas are:
-
30-Day e-Tourist Visa: Good for 30 days after your first entry, and you get double entry.
-
1-Year e-Tourist Visa: Good for 365 days from when you get it, with multiple entries allowed.
-
5-Year e-Tourist Visa: Good for 5 years from when you get it, with multiple entries allowed.
Always look over the validity period and how long you can stay with your tourist visa or any type of e-Visa. This way you will not overstay during your visit.
Applying for an Indian e-Visa Online
Applying for an Indian e-Visa is easy. You do it online at a portal set up by the Government of India. You can fill out the application form at home. In this system, you are asked for your personal details, passport information, and your plans for travel.
You have to get digital copies of your photo and the passport bio page. These be the uploaded documents you need. After you finish the form and pay the fee, your application be sent for processing. The sections below will show you each step, like filling out the forms and checking your application status.
Step-by-step application process
Applying online for an Indian e-Visa can be easy if you stay with the steps. Everything starts on the Government of India e-Visa website. You will find the application form along with all the instructions you need there.
At first, you have to enter your general information. This includes things like your name, your nationality, and all your passport information. It is important to fill this out with care. If you make a mistake, there could be delays or you might not get the visa.
When you finish the form, you move on to upload your documents and pay.
Here is a step-by-step look at the online application process:
-
Visit the official Indian e-Visa website.
-
Choose your visa type and fill out the online application form with correct personal details.
-
Upload a new photo and a scanned copy of the information page from your passport.
-
Pay the visa fee online using a debit card or credit card.
-
You will get your Electronic Travel Authorization (ETA) by email when it is approved.
Keep your application ID. This will help you to follow the status of your application.
Required application forms and where to find them
Finding the right application form is the first thing you need to do for any visa applications. For all Indian visa applications, you must use the application form from the official website run by the Government of India or their approved service providers.
If you want to get an e-Visa, you will find the application form only on the official Government of India e-Visa portal. For a regular visa, you need to fill out the application form on the Indian Visa Online website. Then, you have to take a printout and bring it to a BLS International centre, as they do visa work for the Indian government in Canada.
Here is where you get the right forms:
-
e-Visa Application: You can find this on the official Government of India e-Visa website.
-
Regular Visa Application: You will get this on the Indian Visa Online portal.
-
Supporting Forms: The BLS International website for your area has any other forms you need, like consent for minors or declarations.
It is important to check that you are always on an official website so you do not run into fake or scam third-party sites.
Payment methods and fee instructions
Paying your visa fee the right way is an important part of your application. The way you pay depends on if you are getting an e-Visa online or a regular visa at a centre.
If you apply for an e-Visa, you need to pay the fee on the official government portal. You can use a credit card like Visa or Mastercard. It is also fine to use a debit card. Keep in mind, there will be bank transaction charges of about 2.5% added on top of the fee. These extra charges are non-refundable, even if your application does not get approved.
Regular visa applications at a BLS centre have more ways to pay the fee:
-
Debit Card: This is the method most people use when paying in person.
-
Cash: Try to give the exact amount so things go faster.
-
Demand Draft/Money Order: This is for visa applications sent by mail. Make it out to “BLS International Services Canada Inc.”
You can not use personal cheques for any visa applications.
How to track your e-Visa application status
After you send in your e-Visa form, you can check the status online. The Indian government’s official e-Visa site has a special page for you to see how your application is moving along. This helps you feel calm and get ready for your arrival date or your expected date of travel.
To see your status, you need the Application ID that you get when you fill out the form. You also need your passport number. Enter this general information on the status page to get an update. You will see if your application is being looked at, if it is approved, or if more information is needed.
To track your application:
-
Go to the official Indian e-Visa website.
-
Find the “Check your Visa Status” tab.
-
Enter your Application ID and passport number.
It is smart to check the status every now and then, mainly as your date of travel gets closer.
Required Documents for Indian Visa Applications
Getting the right papers is very important when you want to get an Indian visa. No matter if you are trying for an e-Visa or a regular visa, you have to hand in the required documents with your application form. Your passport is the main document for all visa applications.
If you are doing an e-Visa, you will need to upload the documents. This means a digital photo and a scan of your passport. If you are going for a regular visa, you have to give physical copies. The parts below will talk about what you need for your passport, your photograph, and any other papers you have to get.
Passport requirements and validity
Your passport is the most important paper when you apply for an Indian visa. Every Canadian passport holder must make sure to have a passport that follows all rules. If you do not meet these rules, your Indian visa application might be turned down.
Your passport has to be valid for at least six months from the date of arrival in India. You should also have at least two blank pages in your passport for the stamps when you travel. Your name and date of birth must match what is on your passport and what you write in your Indian visa paperwork.
Key passport requirements include:
-
Validity: Your passport must have at least six months left from the time you plan to arrive in India.
-
Blank Pages: At least two blank pages in your passport.
-
Old Passport: If you are someone of Indian origin, you might have to give your old Indian passport or a surrender certificate.
Look at your passport’s expiration date before you start your Indian visa application.
Photograph and biometric guidelines
Your photo for a visa application must follow the rules made by the Indian government. The same rules apply if you upload documents online for an e-Visa or bring a printed photo for a regular visa. The details about the photo must be followed.
The photo needs to be new, show your whole face, and you need to face the camera. Your eyes should be open, stay in the centre, and do not smile or frown. The photo has to use a plain white background with no shadows showing. If you are doing an e-Visa, your uploaded documents need the picture saved as a JPEG. The photo must also be the right size.
Here are the rules for your photo:
-
The photo must be in colour and very new. It should be taken in the last 6 months.
-
You must use a plain white background.
-
Your whole face needs to show from the top of your hair down to your chin.
-
You cannot wear glasses (unless you have to for health reasons). No hats or things on your head that hide your face.
When you apply for most regular visa applications, you may also need to go to a BLS centre. There, you will give your fingerprints and get a digital photo taken.
Additional supporting documents for specific visa types
Besides your passport and photograph, some types of visas need you to give extra documents to show why you want to visit. You have to give these papers with your application form, and they prove the reason for your trip.
For the business visa, you must have an invitation letter from a company in India. For a student visa, you should get an admission letter from an approved school in India. If you do not give these papers, your application will not be complete.
Here are some samples of what you need for each visa type:
-
Business Visa: You need a letter of invitation from a business in India and a letter from your Canadian boss or company.
-
Medical Visa: You need a note from the hospital in India that says you have an appointment and shows your treatment plan.
-
Student Visa: You must show papers that you got into a school or college in India.
-
Conference Visa: You need an official invitation from the people who made the event.
Make sure you know what papers are needed for the visa type you choose.
Document upload procedures
When you apply for an Indian e-Visa, you must upload digital copies of your uploaded documents right on the official government of India website. This step is important in the online application form, and you have to do it the right way so your application goes through.
The main uploaded documents are a digital photo and a scanned copy of the page in your passport with your information. Each one has its own size and format rules. The digital photo needs to be a JPEG file of 10 KB to 1 MB. The scan of your passport must be a PDF file that is between 10 KB and 300 KB.
To make the upload process easy for you:
-
Scan your passport’s bio page in clear colour.
-
Be sure that your digital photo follows the rules, like having a white background.
-
Double-check that your files are in the right format (JPEG for the photo, PDF for the passport) and not too big or too small before you begin the application.
If your uploaded documents are hard to see or not what they ask for, the government of India may delay or turn down your application.
Fees and Payment Information for Indian Visas
Knowing the costs for your Indian visa is a big part of getting ready for your trip. The fee you pay will change based on what type of visa you get and how long it is for. The government of india decides these fees. They can change at any time. Besides the main fee, you should know that there may be bank transaction charges or service fees too.
You should also know what ways you can pay and what the refund rules are. In most cases, you do not get your money back if your application is not successful. This section will help you understand the fee structure, payment choices, and some common questions about the costs.
Visa fee structure for Canadians
The visa fee for Canadian nationals is determined by the Government of India and depends on the visa type and its duration. For instance, a tourist visa for up to one year has a different fee than a business visa or a longer-term 10-year tourist visa.
These fees are often listed in Canadian dollars and typically include a base visa fee, an Indian Community Welfare Fund (ICWF) fee, and a service charge from the application centre (like BLS International). It’s important to check the most current fee schedule before you apply, as they can be updated.
Here is an example of a fee structure for some visa types for Canadian nationals:
|
Visa Type and Duration |
Visa Fee (CAD$) |
ICWF Fee (CAD$) |
BLS Service Charge (CAD$) |
Total Fee (CAD$) |
|---|---|---|---|---|
|
Tourist Visa (up to 1 year) |
135 |
5 |
1.70 |
141.70 |
|
Missionary Visa (up to 6 months) |
108 |
5 |
1.70 |
114.70 |
|
Intern Visa (up to 1 year) |
108 |
5 |
1.70 |
114.70 |
|
Film Visa (up to 1 year) |
162 |
5 |
1.70 |
168.70 |
Note that fees for e-Visas are paid online and may differ from the fees for regular visas processed through BLS centres.
Accepted payment methods
The way you pay for your Indian visa fee depends on how you apply. If you do the regular visa or e-Visa online, you pay on the government website. There are bank transaction charges for card payments.
If you apply for a regular visa in person at a BLS International centre in Canada, you have two main ways to pay. You can use your debit card, which is simple and fast. Cash is also accepted. It is good to bring the exact amount for cash so you do not waste time.
Here is how you can pay:
-
Online e-Visa Application: Pay with a credit card (Visa or Mastercard) or debit card. Bank transaction charges apply.
-
In-Person Application: Pay with a debit card or cash.
-
Postal Application: Pay by demand draft or money order, made to “BLS International Services Canada Inc.” Personal cheques will not work.
It is smart to check with your visa centre to know which payment methods they use before you visit.
https://www.blsindia-canada.com
Refund policies and payment issues
When you apply for an Indian visa, you need to know that all fees you pay are not refundable. The Government of India and any place that handles these visas do not give refunds. This goes for every case, no matter if you get the visa or not.
If the Indian Mission rejects your application, or if you choose to cancel it after you send it in, your money will not be given back. This fee is mainly for them to process your papers. It does not mean you will get a visa for sure. If you run into problems when paying online, you should try to fix it right away. If your payment for the Indian visa does not go through, do not fill out a new form. Just try to pay once again for the same application. This helps you to not pay twice.
Key points for refunds and how to pay:
-
Non-Refundable Fees: All fees and service charges for an Indian visa are set and will not be paid back to you.
-
Payment Issues: If you have trouble paying online, take a break for a few hours, then pay again. Do not make a new form.
-
No Guarantee: When you pay the Indian visa fees, that does not mean you will get a visa. The Indian Mission has the final say.
Keywords: indian mission, government of india, indian visa
Common questions about payments
Getting through the payment steps for an Indian visa can bring up many questions. It is good to know the details first. This helps you avoid mistakes and makes sure your visa application goes well.
One thing people ask about a lot is extra fees. If you pay online, there will usually be bank transaction charges of around 2.5% added to the visa fee. This comes from the payment gateway. Another frequent question is if you can pay for more than one application together. You can often do this at in-person centres.
Here are clear answers to some payment questions:
-
Are there hidden fees? The answer is no. But you should be ready to pay bank transaction charges for online payments, and there will be service fees at the application centres.
-
What happens if I overpay? Overpayments are almost never given back. Make sure you pay the right amount each time.
-
Can I pay with a personal cheque? No, you cannot. Personal cheques are not accepted.
-
Is the fee the same for all nationalities? The fee changes depending on your nationality, so it is not the same for everyone. The amounts talked about here are for Canadian citizens.
If you know more about bank transaction charges before you apply for an Indian visa, it will make everything easier.
Processing Times and Validity Periods
A lot of people ask, “How long does it take to get an Indian visa?” The processing time for an Indian visa can change a lot. It depends on the type of visa you need and where you are applying. It is smart to apply long before your date of travel. This can help you avoid stress at the last minute.
The validity of the visa is very important too. This will decide how long you can use your Indian visa to enter India and how long you can stay in the country. In this section, you will find the average processing times, how long you can stay with each visa type, and what can slow down your application.
Average processing time for Indian visas
The processing time for an Indian visa is just an estimate, and it can change. For e-Visas, the process is fast most of the time. Many people get their Electronic Travel Authorization (ETA) in about 72 hours. But it’s a good idea to apply at least four days before you fly.
If you use a BLS centre for a regular visa, the processing time is much longer. The government of india says these normal applications take at least 30 days after you send them in. This does not count the time to mail your papers back and forth.
Here are the estimated processing times:
-
e-Visa: Usually 24 to 72 hours, but try to apply at least 4 business days ahead of time.
-
Regular Visa (in-person): At least 30 days. The time can be longer when it’s busy or if your case needs more work.
-
Regular Visa (by mail): Add 3–4 more working days on top of the normal processing time.
These times are only estimates, so it’s smart to apply as early as you can.
Validity of different Indian visa types
The validity of the visa dictates when you can enter India and for how long. It’s crucial to understand that the validity period starts from the date the visa is issued, not from your date of entry into India.
Different visa types come with different validity periods and entry allowances. For example, a short-term tourist e-Visa might offer double entry within a 30-day window, while a 10-year tourist visa allows multiple entries over a decade. A single entry visa allows you to enter India only once.
Here’s a general guide to the validity of some common visa types:
|
Visa Type |
Typical Validity Period |
Entry Type |
|---|---|---|
|
30-Day e-Tourist Visa |
30 days from first arrival |
Double Entry |
|
1-Year e-Tourist Visa |
1 year from date of issue |
Multiple Entry |
|
5-Year Tourist Visa (Regular/e-Visa) |
5 years from date of issue |
Multiple Entry |
|
Business Visa |
Up to 5 or 10 years |
Multiple Entry |
|
Student Visa |
Duration of the course (up to 5 years) |
Multiple Entry |
Always check the specific details on your visa, as the final decision rests with the issuing authority.
Circumstances that may affect processing
There are many things that can slow down the processing of your Indian visa application. If you know about these, you can get ready and plan your travel plans better.
The main reason for most delays is not giving all the required documents or putting the wrong information in the form. A photo that does not meet the rules can also stop the process. Sometimes, people who are of Pakistani origin need extra checks. This makes the process slower. There are also times when lots of people are applying. When that happens, consular services take more time.
The things below may cause delays:
-
Incomplete Application: If you do not fill out everything or miss any documents.
-
Need for Verification: If your application needs background checks or special clearance.
-
High Application Volume: When many applications come in at the same time, the process at offices slows down.
Do not book flights or where you will stay if they are not refundable until you have your Indian visa in your hands. This way, you do not lose money if there are delays.
Expedited processing options
For people who need to get to India fast, there is a quick way to get an e-Visa. This is for real emergencies like a health problem or someone passing away in the family. It makes the processing time much shorter.
The urgent e-Visa choice is also called the “fast-track” service. The goal is to process your application within 24 to 48 hours. But, it costs more and you have to show proof that it is an emergency. The government of india makes the final choice, so even with this service, approval is not sure.
Key points about expedited processing:
-
Availability: For e-Visas when there is a real emergency.
-
Processing Time: The goal is to approve it in one or two business days.
-
Cost: There is a higher fee for this quick service.
This way to get an e-Visa is not open for all kinds of visas. It should only be used when there is a true emergency, not just because of poor planning.
Entry Rules and Restrictions for Canadians
After you get your Indian entry visa, you need to know the rules for coming into India and being there. The indian government has some rules for people who want to go into some parts of the country. There are strong penalties if you do not follow the visa rules.
If you want to visit a place that needs a special permit, or if you stay longer than your visa lets you, it can cause big problems. You might get a fine, be sent out of the country, or not get a visa in the future. Knowing these rules will help you have a safe and easy trip. Here, you will learn about special permits, reasons for visa refusal, and what happens if you overstay your visa.
Restricted and protected area permits
Some parts of India are set as restricted or protected areas by the Indian government. This is done for safety reasons or to look after the cultures of local people who live there. You need to have a special permit to go to these places, even if you already have an Indian visa.
These areas are found mainly near the borders of the country. Some examples of these places are in Arunachal Pradesh, Sikkim, and the Andaman and Nicobar Islands. The Government of India says all foreign nationals, including those from Canada, must get a Restricted Area Permit (RAP) or Protected Area Permit (PAP) before they can enter any of these spots.
Here is what you may need to do to get your permit:
-
Apply through the Ministry of Home Affairs or go to an Indian Mission in another country.
-
Travel with a tour group set up by an approved travel agent.
You cannot enter these areas without the right permit, and you will be stopped if you try. It’s a good idea to check ahead of time if the place you want to visit needs a special permit.
Regions with special access requirements
Some areas in India have special access rules or travel warnings, even if they are not officially marked as restricted. The Indian government may ask foreign travelers to sign in with local offices when they arrive or to follow other important rules.
For example, people planning to visit parts of Jammu and Kashmir, or parts of the northeast, may need to keep in mind the security steps there. It is important to know that you may not need a special permit, like a PAP or RAP, for these places. Still, the Indian government says you should always stay up to date about what is happening before and while you are in these areas.
Regions where you might face special access rules include:
-
Parts of Northeast India (like Nagaland, Manipur, Mizoram)
-
Some spots in Jammu and Kashmir
-
The Lakshadweep Islands
You should always check for the most current travel advice from the Canadian and Indian governments before you make plans to go to any of these sensitive places.
Actions that may lead to visa refusal
It can be tough to get a visa refusal when you want to travel. It may change your travel plans, but you can avoid some of these problems if you know why they happen. The Indian authorities are the ones who have the final say about your visa, and they may refuse it for many reasons.
A common reason why people do not get a visa is that their application form is not complete or is filled out wrong. If your application form is not the same as your required documents, this may cause problems. If you have not followed visa rules before, like staying longer than you should, that can also keep you from getting a visa. In the processing of the application, any part that looks wrong could make them decide against you.
Here are actions that can make you get a visa refusal:
-
You give information that is not true or is not clear on your application.
-
You do not send in all the required documents or some information is not right.
-
You have a criminal past.
-
You have broken Indian immigration rules before.
Take your time with each application form, and make sure you are honest, to make it more likely your visa is approved.
Overstaying and penalties
Overstaying your Indian visa is against the law and can get you into a lot of trouble. The validity of the visa tells you the last day you can stay in India. It is your job to make sure you leave on or before that date.
If you overstay, you could face large fines, be put in jail, or be sent back to your country. Even if you only stay one extra day, it could lead to you being banned from coming back to India with an indian visa later. If something happens that you didn’t expect, and you can’t leave on time, you should reach out to the nearest Foreigners Regional Registration Office (FRRO) as soon as you can. They may help if you ask for more time to stay.
Here’s what can happen if you overstay:
-
Fines: You will have to pay a lot of money.
-
Blacklisting: You might not be able to come back to India for a long time or ever.
-
Deportation: You may get sent back to your own country and you will have to pay for it.
It is important to know about your visa expiry date and make sure you leave India before your time runs out.
Special Advisory for Canadian Passport Holders
If you have a Canadian passport, it is important to keep up with the latest travel news for India. Rules about visas, health, safety, and entry can change quickly. You need to look for the newest updates before you go on your trip. The best places to find this are the Government of Canada’s travel advisories and the website of the Indian Ministry of External Affairs.
These sites tell you about things like changes to visa policy, news from the ministry of external affairs, and any safety issues in different parts of India. By using information from official sites, you can make sure you get the documents you need and know about any problems that could come up. This section will show you the best places to go for the most recent advisories, policy updates, and contact details for consular help for all Canadian passport holders.
Current travel advisories for India
Before you travel to India, make sure you check the latest travel advisories. These are important to help you stay safe. You will find details about health risks, rules, and the law. These updates change often to show what is happening on the ground.
The Government of Canada gives up-to-date advice for Canadian travellers. The official website has information for each region. You may also look at what the Indian Ministry of External Affairs or the Indian Embassy says about rules and updates that may impact you.
To keep yourself up to date, go to:
-
The Government of Canada’s official travel advisory page for India.
-
The official website of the High Commission of India in Ottawa or its consulates in Canada.
-
Announcements from the Indian Government of India’s Bureau of Immigration.
When you check these before booking and before you leave, you will have better information. This can help you travel with more confidence.
Changes in policy or requirements
Visa requirements and immigration policies from the government of india can change at any time. These changes may affect visa fees, how long things take, who can get a visa, and what required documents you need.
For example, the government of india might add a new kind of visa. They could stop certain visa services or change the list of countries that can get an e-Visa. The news about these changes usually comes out on official websites or through the indian embassy. It is up to you, the traveller, to know about these updates.
To keep up with changes:
-
Often check the website for the indian embassy or consulate in your area.
-
Look at the official indian e-Visa portal for any news about electronic visas.
-
Follow news from trusted sources about indian visa rules.
Using old information for your travel plans can make things go wrong. Always check the most recent visa requirements, rules, and required documents before you apply.
Contacts for Canadian passport queries
If you have questions about your Indian visa as a Canadian passport holder, it’s a good idea to talk to the official sources right away. There are a few places that can help people with this.
The High Commission of India in Ottawa is an important office. The Consulate General of India offices in Toronto and Vancouver also handle visa things. If you just want to ask about applications or need to give your papers, you should first reach out to BLS International. They are the official group working with the Government of India in Canada. BLS International runs the application centres. They can tell you about how to apply, what papers you need, and other rules.
Here are the main ways to get help:
-
BLS International Services: They help with questions about handing in your application, payments, or how to track your application. For each Canadian city, you can find ways to contact them on their website.
-
Indian Embassy/Consulate General: If there is a difficult problem or BLS can’t help, you can write to the Indian mission with an email. The Indian embassy or consulate general will step in for bigger problems, if needed.
-
The Government of India’s e-Visa Helpdesk: If your questions are about your online e-Visa application, you can get help from this support centre.
Each of these steps makes it easier for passport holders to find the right answer about their Indian visa application with help from the government of india, an indian embassy, or the
Health and security considerations
Health and security should be at the top of your list when you get ready to go to India. If you are one of the Canadian nationals, you need to know about the health risks that can come up. You may need some shots and medicines to stay safe, and this is true for yellow fever too, based on where you have been. Check with the government of india or other trusted groups to keep up with new safety news for each region. Make sure to bring the right medical documents and the items you need, like prescriptions. You should also get travel insurance that will help pay for any medical treatment you may need if things do not go as planned.
Staying Up-to-Date on Indian Visa Policies
It is important for Canadian travelers to watch the changes in Indian visa rules before they make travel plans. You should visit the official website of the Government of India or check with the Indian Embassy often. That way, you will get the most up-to-date details about the Indian visa, types of visas, and all needed and required documents for visa applications. You can also follow the Ministry of External Affairs or sign up for their newsletters to stay updated. Beside these government and official channels, looking at travel forums and talking with other people who have been to India can give you useful hints. Using information from these sources will make your travel plans smoother and help you avoid problems at the last minute when you apply for your visa.
Official government sources for Canadian travellers
Getting good information is important for Canadian travellers who want to go to India. The official website of the government of india gives all the details you need on visa requirements, visa type, how to apply, and government policies. Make sure you also check with the indian embassy in Canada. They offer consular services and can help with your questions about required documents for your visa type. By using these official sources, you will know about any changes to processing times or what documents you need. This way, your travel goes more smoothly and you feel better prepared.
Embassy and consulate information
Canadian nationals who want to visit India should get to know about the location and services of the Indian embassy and consulate general. These offices help visa applicants with different visa types, like tourist and business visas. The official website of the indian mission has lots of general information. It helps you understand what you need for your application form, required documents, and processing time.
If there is any problem during your trip, you can reach out to the consulate general. It is important to keep their contact details with you for emergencies. Always check with them for any updates about visa requirements or travel advisories.
Trusted travel agencies and resources
Finding good travel agencies and using the right resources is important for easy visa applications and travel plans to India. Many Canadian nationals pick well-known agencies that help with everything, like getting the right visa, such as for travel or business.
You can also use official websites and trusted online places to make things better. It’s a good idea to check for new updates, such as required documents and the time it will take to process. Reading reviews and asking others for advice helps. This lets your travel plans match with agencies you can trust, and they will help you with your visa applications in the right way.
How to receive timely updates
Staying up to date with visa requirements and changes can help you get the most out of your travel plans. Canadian nationals should check the official website of the Government of India often before a trip. It’s a good idea to sign up for alerts, so you can get news about processing times and required documents sent right to your email. You can also follow the Indian embassy and consulates on social media. This helps you see real-time news and updates. Talking to trusted travel agencies can give you help with your visa applications and travel plans.
Conclusion
It’s important for Canadian travelers to keep up with visa policies before going to India. If you know the latest updates, it can make the application easy and help you stay away from problems when you travel. The Indian government changes visa requirements often, so make sure you check trusted sources for clear and true information. No matter if you want a tourist visa or a business visa, you should know about the validity period and have all the required documents ready. This will help you enjoy your trip without worries. Have a good time in India and enjoy all the new things you will see!
Frequently Asked Questions
Can I apply for an Indian tourist visa from Canada online?
Yes, Canadian citizens can get an Indian tourist visa by applying online at the official government site. This makes it easy for you to send in the right papers and payments on the internet. Make sure all your info is right, so you do not face any delay with your tourist visa.
What documents do I need as a Canadian traveller visiting India?
As a Canadian visiting India, you must have a valid passport. You will also need the right visa. This can be a tourist or business visa. Bring proof that you will go to, or come back from, another place. Keep your vaccine papers with you in case you are asked for them. This will help make your trip easy when you enter the country.
How long does it take to process an Indian visa for Canadians?
Getting an Indian visa for Canadians usually takes about 3 to 5 business days. The time can change based on the visa type and how many people are applying. It’s best to apply early for an indian visa. This way, you can deal with any delays or if more papers are needed.
Where can I check the status and updates regarding my Indian visa application?
You can see the status of your Indian visa application on the official Indian government website. You can also check it at the visa application centre where you gave your documents. Also, watch your email for any updates from the consulate or embassy.