Key Highlights
-
Israel has different types of visas. These are for things like tourism, study, work, or religious trips.
-
Many people do not need a visa for a short visit. But, you will soon need an Electronic Travel Authorization (ETA-IL).
-
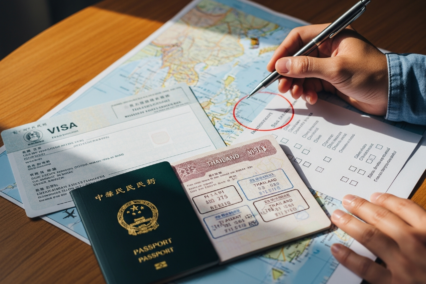
The visa application process often has you fill out an online form, send in documents, and pay a fee.
-
The main visa requirements are a valid passport, recent photos, proof that you have enough money, and a place to stay.
-
You can get your Israel visa through the official paths or at the Embassy of Israel.
-
The visa application process time can be different. It depends on the visa type and how many people are applying then.
Introduction
Are you planning a trip to Israel? You should know about the visa process before you start your adventure. If you are traveling for fun, work, or study, you will need to get the right Israeli visa. This is important for all foreign nationals who do not come from a visa-exempt country.
This guide will help you learn about the different visa categories, the required documents you need, and the whole application process. With this information, you can make sure that your travel plans go well from start to finish.
Visa Categories for Israel
Israel gives out different types of visas because people want to come to the country for different reasons. Your reason for coming will help you decide which type of Israel visa you need. Each visa has its own rules that must be followed.
There are visas for short visits as a tourist. There are others if you want to work or study for a longer time. It’s good to know how each one is different. The Israel visa application process is not the same for all kinds of visas. So, your first step is to be sure about which visa you should get. The next parts will talk more about the most common types of visas for foreign nationals and explain the application process.
Tourist Visas (B2)
Do you want to see the old places and the great views in Israel? The B2 Tourist Visa lets people come to Israel for travel, to see family, or to take part in a short business meeting. This entry visa gives you up to 90 days in Israel. So, you get enough time to enjoy and see what the country brings.
To get the tourist visa, you have to give a few travel documents to the Israeli consulate or embassy where you live. You will need to give: a filled-out application form, your passport, a few new pictures, and sheets that show your travel plans like flight info and hotel bookings. With everything ready, this israel visa helps you start your new and exciting trip.
You need to remember, the B2 visa does not let you work while in Israel. This Israel visa is only for fun, visiting, or meetings that do not pay you. When your travel documents are all set, the application process is simple. You will be ready for a good and easy trip.
Student Visas (A2)
If you want to study in Israel, you will need to get the A2 Student Visa. This student visa is for people who have been accepted to a known school or college in the country, like a university or a yeshiva. The visa lets you live in Israel for as long as you study. You will get the visa for up to one year first, but you can renew it later.
There are different types of visas, but for a student visa, you have to bring some required documents with your application form. You must show an acceptance letter from your school in Israel. You also need proof that you have enough money for both tuition and living costs. The completed application form helps prove you are really going to study.
The A2 visa gives you temporary residence while you study. But keep in mind, this visa does not usually let you work. To get this visa, you must apply at an Israeli consulate in your country of residence before you go.
Work Visas (B1)
If you are a foreign national and want to work in Israel, you will need to get a B1 work visa. This type of visa is for people who have a job offer in the country. The first step is for your employer in Israel to get a work permit for you from the Ministry of Interior.
After your work permit is approved, you can go to the Israeli consulate in your home country to apply for your visa. The B1 work visa is connected to the employer and job offer you have. The visa is usually good for one year. You can extend it if you are still working in Israel and meet all the rules.
Getting a B1 work visa is important if you want to work in Israel and get the protection of the country’s labor laws. Without this type of visa, a foreign worker cannot get paid legally in Israel. This process helps to keep all foreign workers safe and makes sure everything is done by the law.
Religious and Clergy Visas (A3)
The A3 Clergy Visa is an entry visa for people who need to travel to Israel to do work for a known religious group. This israel visa is for priests, rabbis, imams, and other people in religious roles. They get asked by their own religious groups in Israel to come and do their jobs.
To get this religious entry visa, the religious group in Israel needs to send you a formal invitation. They usually start the process by making a request to the Ministry of Interior, which is part of the israeli government. This step is important because it shows you are coming for real work that a group in Israel supports.
When the israeli government agrees with the invitation, you can then apply for your A3 Clergy Visa at the Israeli consulate in your home country. With this israel visa, you can live in Israel and do the religious work you are meant to do. The visa is only good for a set time. If your work goes on, you might be able to extend it.
Visa Exemptions and ETA-IL System
Did you know you may not need an entry visa to go to Israel? If you are from many countries, you can travel to Israel as a tourist or for work without getting a visa first. You can stay for up to 90 days. This makes it easy for people who want to visit.
But that is going to change soon. Israel is starting a new system. Even visitors from countries that do not need a visa will have to get an electronic travel authorization (ETA-IL) before coming. This will help people get into Israel faster and keep things safe. In the next part, we will talk about which people can get in without a visa and how to use the new ETA-IL system.
List of Visa-Exempt Nationalities
If your country of residence is on Israel’s visa-exempt list, you can visit for up to 90 days for tourism without needing a visa beforehand. This greatly simplifies travel plans. These visa-exempt nationalities include the United States, Canada, and all European Union member states, among many others. This policy reflects the strong diplomatic ties between Israel and these nations.
However, it’s crucial to remember that visa exemption doesn’t grant an automatic right of entry. Israeli border officials have the final say. You will still need a passport valid for at least six months from your date of entry and may be asked for proof of funds and a return ticket. The visa requirements are waived, but entry conditions still apply.
Here is a partial list of visa-exempt nationalities. Always check the most current list from an official source before traveling.
|
Region |
Countries |
|---|---|
|
North America |
United States, Canada, Mexico |
|
Europe |
All EU countries, United Kingdom, Switzerland, Norway, Russia |
|
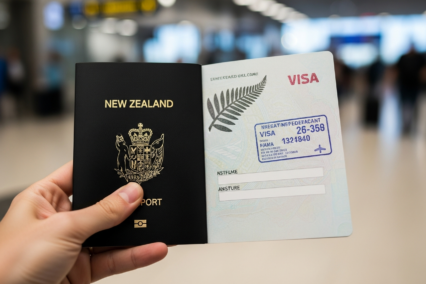
Oceania |
Australia, New Zealand |
|
South America |
Argentina, Brazil, Chile, Colombia, Uruguay |
|
Asia |
Japan, South Korea, Hong Kong, Singapore |
Introduction to the ETA-IL Electronic Travel Authorization
Israel is now making it easier for visitors to enter the country with the new ETA-IL system. What is an Electronic Travel Authorization? It is a way for people from countries that do not need a visa to get a quick, online approval before they travel. This system helps make the entry steps faster and also keeps things safer. Soon, everyone from these countries will need the ETA-IL before they get on their plane to Israel.
The process is easy and all online. You need to fill out an application form with your details and travel plans. The system will check your information with security records. If it is approved, the ETA-IL will last up to two years, and you can come in and out more than once during that time.
Key points about the ETA-IL include:
-
It is for citizens of visa-exempt countries.
-
The application is done online before you travel.
-
Approval is typically fast, often within a few days.
This new rule should help your entry to Israel go smoother because your documents will be checked before you get to the border. Remember to keep your travel documents ready when you fill out the application form.
How ETA-IL Works for U.S. Travelers
If you live in the United States, you do not need a visa right now for short tourist trips to Israel. But with the new ETA-IL system, the steps will change a little. You will soon have to get this electronic travel authorization before your trip. You can apply for it online, and it works like an electronic visa check for travel.
When you want to fill out the israel visa application for the ETA-IL, it is easy to do. You just go to the government website. You fill out the application form with your passport details and travel plans. You will send it in for them to look at. This electronic travel authorization system is made to be simple for people to use. You should get an answer within a few business days.
Here is how U.S. travelers can get ready:
-
Visit the official ETA-IL website.
-
Complete the application form with your personal and passport information.
-
Pay the small processing fee and submit your application.
When they say yes, your ETA-IL will be linked right away to your passport. This will help you get into Israel faster and make your trip better.
Requirements for Non-Exempt Countries
Travelers from countries that are not visa-exempt must get a visa before they can travel to Israel. If you are not from a visa-exempt country, you cannot just use your passport to board a flight. You need to start the application process and apply for the right visa, like a tourism visa (B2), at an Israeli embassy or consulate in your country of residence.
The visa requirements are stricter for people from these countries. You will have to gather all the required documents to help with your application. This is done to make sure you have a good reason to visit and that you will go back to your home country when your trip is over.
Commonly required documents include:
-
A completed and signed visa application form.
-
A valid passport with at least six months of time left before it expires.
-
Proof of travel plans, which can be your flight bookings and hotel reservations.
-
Proof that you have enough money for your trip.
Be sure to prepare each of these documents well, as it will help you in the visa application process.
Israel Visa Requirements and Documentation
Getting the right paperwork ready is a big part of your Israel visa application. If you do not have the necessary documents, your application can take longer to process or may even get turned down. Since each visa type has its own list of required documents, it is important to know what you need.
You will need to have your passport, photos, proof of your travel plans, and documents that show your money situation. Every one of these is needed for the israel visa application. In the next sections, we will talk about which items you need for your israel visa. This will help you feel confident about the application process. Let’s make sure you have all the required documents so your application goes well!
Essential Documents for Visa Application
When you apply for any Israeli visa, you always need to show some basic required documents. These things are like the base of your application. The first and most important thing is to fill out and sign your visa application form. You can download this from the Israeli embassy or consulate website in your country.
The next thing you must give is your passport. It should be valid for six more months past the date you plan to leave Israel. It also needs to have at least one blank page for the visa stamp. Check your passport’s date early so you do not run into problems at the last minute.
Here are the main required documents you will need to give:
-
A completed and signed application form.
-
A valid passport.
-
Two recent passport-sized photos that follow the rules for visa photos.
When you have all these ready, you make the process easier and give yourself a good chance for approval.
Photo and Biometric Guidelines
Your application photos need to follow clear rules to be accepted. The rules for an Israeli visa photo are strict, and if you do not follow them, the application process can take more time. You will be asked to bring two recent passport-sized photos that look the same.
The photos have to be in color. They should be taken against a plain white or light background. Your face should show a neutral look, and both eyes must be open. Head coverings can only be worn for religious reasons, but your face still must show fully and clearly. It’s a good idea to use a professional service because they know what is needed for visa photos.
Sometimes, you may need to give biometric data too.
-
This means your fingerprints will be scanned, and a digital photo will be taken.
-
This is done at the visa application center or at the consulate.
-
Giving biometrics helps verify you are the right person when you get to Israel.
You should always look up what the embassy wants for your application.
Proof of Funds and Accommodation
Showing that you can take care of your expenses while you are staying is very important for the visa application. You have to give proof that you have enough money for things like your place to stay, food, and things you want to do. This means you can pay for yourself without working in ways that are not allowed.
There are a few ways to give this proof. The most popular way is to share bank statements from the last three to six months. You can also use a letter from your work that lists your pay or a letter from someone who will take care of your expenses. You must also show proof of where you will stay, like hotel bookings or a letter if friends or family will host you.
You will also need health insurance.
-
Show a copy of your insurance policy that takes care of any medical problems in Israel.
-
Make sure your insurance coverage works for all the days you are there.
-
It is important to show you are ready for any sudden medical need.
Additional Requirements by Visa Type
Visa requirements are not the same for everyone. They change based on the type of visa you want. Some documents are always needed, but each visa type can have its own rules. For example, if you apply for a student visa, you will need an acceptance letter from a school. You do not need this paper for a tourist visa.
If you plan to bring family members with you, you have to show more documents like marriage papers or birth certificates. These visa requirements help prove why you are traveling and if you can get that visa.
Here are some examples of what you might need, depending on your visa type:
-
Work Visa (B1): You have to get a work permit that is approved by an employer in Israel.
-
Student Visa (A2): You must have a letter that shows a recognized Israeli school has accepted you.
-
Clergy Visa (A3): You will need a letter from a religious group in Israel that invites you.
Always look up the visa requirements for your own type of visa and for your country. The rules are different for people from the U.S., India, or EU countries.
Israel Visa Application Process
Now that you know what you need, let’s go over the Israel visa application process step by step. The application process can look hard at first, but if you break it down, it gets much easier. You will fill out some forms and send in your papers. We will help you all the way.
To get your Israel visa, there are a few important steps. You must find out how to start your online application. You will learn where to turn in your papers and where to give your biometrics. You also need to know how to pay the fees for your visa application. The next parts will show you what you have to do at every stage of the visa application process.
Step-by-Step Online Application Instructions
The first thing you need to do to start your visa process is to fill out an online application. Now, most Israeli embassies and consulates want you to begin your application on the internet. You have to look for the right application form on the official website of the Israeli embassy or on a visa application center’s site.
When you get to the form, fill it in with the right information. Include your name, your passport number, travel plan, and say why you want to go. Make sure you check all your answers before you send it. If you make mistakes, it could take more time to finish your process. When you finish the form, you usually have to print it so you can turn it in with your other documents.
Here’s a simple guide for your online application:
-
Go to the official website of the Israeli embassy or consulate in your country.
-
Find the application form for your visa and fill it out.
-
Send in any digital documents they need. Then submit the form online, or print it out if you have to bring it with you.
This online step is an important part to get started with the whole process.
Where to Submit Documents and Biometrics
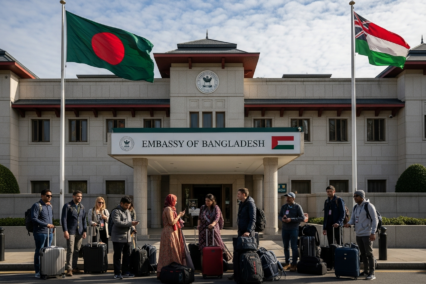
After you fill out your application form, you need to know where to send it with your other papers. Most people turn in their application at the Embassy of Israel or a Consulate General of Israel that covers where they live. It is very important to choose the right place.
In many countries, the Embassy of Israel will have a visa application center to help with the paperwork and taking your fingerprints. These places make it easier by handling many things for you. Most people will have to make an appointment online before going.
Here are the usual places where you can submit your papers:
-
The Embassy of Israel in your country’s capital.
-
A regional Consulate General of Israel.
-
An official visa application center that the embassy works with.
In Israel, you can use the branch office Tel Aviv or the embassy branch office for some needs. This can be helpful for certain consular tasks.
Paying Visa Fees: Methods & Costs
Paying your visa fees is a needed step in the israel visa process. The price you pay will depend on the visa type you want and your nationality. This fee is set to cover the process of looking at your application, and you usually will not get your money back. Even if your visa does not get approved, there is no refund.
How you pay could change based on where you are. Some embassies of israel will ask you to pay online during the online application with a credit or debit card. Other embassies might need a bank draft or cash in the local currency when you go to your meeting. You should always look at the Embassy of Israel website to see what steps you have to take for your region.
Here’s what to remember about israel visa fees:
-
Fees can change based on the type of visa you want (like tourist, student, or work).
-
You may be able to pay online, by bank transfer, or with cash.
-
Fees will not be given back.
Be sure to get a payment receipt and keep it with your israel visa application papers.
Processing Time, Tracking, and Status Updates
After you send in your application, you will start to wait. Knowing the processing time for your israel visa is important when you plan your trip. The time it takes for israel visa processing can be different. It depends on the type of visa you ask for and how busy the embassy is.
The good thing is you do not need to guess what is happening. Many embassies let you see the status of your application as it moves ahead. In the next sections, we will talk about the usual processing time, how to check your status online, and some reasons why there might be delays. This will help you be ready for what could happen when you apply.
Standard Processing Timeline by Visa Type
The processing time for an Israeli visa is not the same for everyone. It largely depends on the visa type you’ve applied for and the specific consulate or embassy handling your case. Applications that require more scrutiny, such as work or student visas, generally take longer than standard tourist visas.
As a general rule, you should always apply well in advance of your intended travel dates to avoid any issues. The timeline is usually counted in business days, which excludes weekends and public holidays. During peak travel seasons, processing times can be longer due to a higher volume of applications.
Here is an estimated processing timeline for common visa types:
|
Visa Type |
Standard Processing Time |
|---|---|
|
Tourist Visa (B2) |
5-10 business days |
|
Student Visa (A2) |
10-15 business days |
|
Work Visa (B1) |
Can take several weeks |
|
ETA-IL |
2-3 business days |
These are just estimates, and actual times can vary.
How to Check Your Visa Application Status Online
Are you waiting to hear about your visa? These days, most people get updates about their online application. If you went through a visa application center, you can often check your status on the center’s website. This is a good way to keep up with the application process and know what is happening.
To see your status, you will need a special number they gave you when you handed in your papers. You may also need your birth date or passport number. Type this in on the visa application center or embassy website. You can then see where your application is in the process.
Here’s what you need to do:
-
Visit the website of the visa application center or embassy where you gave your application.
-
Look for the part that says “Track Your Application.”
-
Type in your application reference number and any personal details they ask for.
This way is the best to get up-to-date information about your online application.
Common Delays and How to Avoid Them
Even if you plan ahead, there can still be delays with visa processing. This often happens when your application form is not complete. If you leave out documents or forget to give needed information, it can stop your application. This means nothing will move forward until you add what is missing. So, it’s really key to check all your paperwork and make sure you meet the visa requirements.
Mistakes on your application form also cause many problems. If you spell your name wrong or make a mistake with your passport number, it can slow things down. Someone has to check your details and ask you for the right ones. If your photos are not clear or do not follow the rules, the office may send your application back to you.
Here are some top problems that make the processing time longer:
-
Incomplete or incorrect application forms.
-
Missing papers you need to support your application.
-
Sending in your application during the busy season when offices have too much work.
If you make sure to check all your papers and send your application early, you can cut down the chance of waiting longer for your visa.
Conclusion
Getting a visa for Israel can be both interesting and sometimes a bit scary. There are different types of visas. These include tourist, student, and work visas. It is important to know the rules and the application process for each. This will help make everything go well.
You need to collect all the papers they ask for. This may include proof that you have enough money and a place to stay. Doing this will help you avoid problems. Be sure to check if there are any visa exemptions. You should also look into the ETA-IL system. This can help you save both time and effort.
If you are getting ready to make your trip, do not be afraid to ask for help. If you have questions about any part of the application process, you should reach out. Taking these steps can make things much easier. This will help you have a better trip to Israel. If you want more help that fits your own needs, feel free to get in touch for a free consultation!
Frequently Asked Questions
Can I extend my Israeli visa while in the country?
Yes, in some cases, you can get more time on your Israel visa. You need to send your request to the Population and Immigration Authority office before your temporary residence visa runs out. Whether you get more time will depend on your visa type and why you need to stay longer.
Are there different visa requirements for U.S. citizens compared to other countries?
Visa requirements can be different depending on your country of residence. U.S. citizens do not need an entry visa for tourism in Israel. They can stay in the country for up to 90 days without getting an Israel visa before they arrive. But if you are from another country, you may have to apply for an Israel visa. So, the rules about visas depend on where you live.
What are some common reasons Israel visas get rejected?
Some common reasons why people get their visa rejected are not meeting the visa requirements, sending in an incomplete application, or not giving all the necessary documents. Other reasons can be not showing enough proof of funds, mistakes or differences in your application, or if you have any history of breaking immigration rules. It is important to be careful and follow all steps during the application process.