Key Highlights
Here are the key things you should know from this guide about invoicing in New Zealand:
-
An invoice is very important for freelancers and small businesses. It helps you ask for payment and keep your cash flow healthy.
-
In New Zealand, the law says you must include some details on your invoices. You need to put a unique invoice number, the date, and your business name.
-
Picking the right invoicing software or accounting tools can help you do things faster. You can start with an invoice template and also use these tools to send payment reminders.
-
Make sure you tell clients your payment terms, like the due date and the payment options they can use. Do this before you start work.
-
There are different types of invoices such as standard, tax, proforma, and recurring invoices. Each one has its own job in your business.
Introduction
Welcome, freelancers and small business owners! It can be hard to work out the invoicing process, but you need to know it if you want to get paid on time. A smooth billing process helps you keep a healthy cash flow. It also helps you look good to your clients. In this guide, you will learn all about how to send an invoice in New Zealand. You will find out about the legal side and also how to pick the right tools. Let’s make it easy for you to get paid and help your business run well.
Understanding Invoicing in New Zealand
For any small business in New Zealand, it is very important to manage the invoicing process well. This is the way you ask for the money that people or companies owe you. It helps to keep a healthy cash flow for your business. If you do not have a good system in place, you may have payment delays and that can cause problems for how your business runs.
A good invoicing process, usually done with an accounting system, can help you keep track of your income and watch your expenses. It also helps you be on top of your money. Let’s talk about what an invoice is, when you need to send one, and what things you must do by law.
What is an invoice and why it matters for freelancers and small businesses
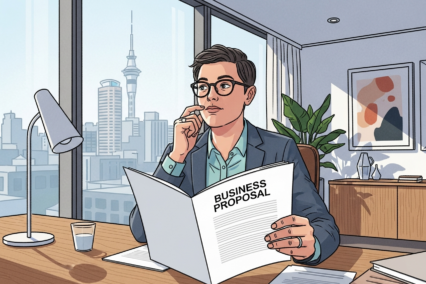
An invoice is a bill that you give to your client after you have done some work or sent out some goods. If you are a freelancer or run a small business, a professional invoice is not just about asking for money. It is a formal way to show what went on in the sale. You use it to list what you sold, how much it costs, and how the client can pay you.
This document is very important when it comes to looking after your small business money matters. It lets you track your sales and helps you check your cash flow. You also get a record for when you have to do your taxes. If your invoice is clear and correct, it can stop any mix-ups and makes it more likely that you will be paid on time.
To work well, your professional invoice has to have some key invoice details. It needs your business info, the client’s details, a unique invoice number, a list of all the things or work you gave, the total amount due, and the due date for payment. These details make sure your invoice is legal and show that you run your business in a good way.
Common scenarios for sending invoices in New Zealand
As a small business owner or freelancer in New Zealand, there will be different times when you need to send out invoices. The time you send an invoice and what kind you send often depends on what you and your client have agreed to and the type of work you do. Knowing about these usual situations will help keep your payment process simple and can also help with your cash flow.
Sending your first invoice to a new client is your chance to start a good, professional connection. If you are offering ongoing services, you and your client might decide on a set billing plan. This could have you sending an invoice once a week, every two weeks, or once a month. This keeps the money coming in for your work.
Here are some common times when you would send an invoice:
-
After project completion: If you do a one-off job, you will send the last invoice after all the work is done and your client is happy with it.
-
Based on milestones: When you have a bigger project, you can send an invoice at different points or important steps along the way. This makes it easier for you and your client to manage cash flow.
-
Upfront deposits: You might ask for some of the payment before you start work. This helps to lock in the job and pay for early costs.
Legal requirements for invoices under New Zealand law
When you send an invoice in New Zealand, you need to include some key details. This helps make sure you follow the rules, especially if you are GST-registered and need to issue a tax invoice. The Inland Revenue Department (IRD) says what your invoice must have, so it is a good record for business and tax.
Your invoice should show your business name. You also need to include your contact details and those of your client. You have to put a unique invoice number on it so you and your client can keep track of the payment. Add the invoice date to show when you gave out the bill. The due date lets the client know when the money must be paid.
Next, state the goods or services you gave out and put down the quantity and price for each item. If you are GST-registered, you must show the GST amount on its own or say if the full price includes GST. Meeting these rules will help you stay on track and stop payment delays, as they make things clear for your clients.
Types of Invoices Used by Freelancers and Small Businesses
If you are a freelancer or run a small business, you will come across different invoices. Each one has its own use. Picking the right invoice type helps you keep things clear for you and your clients. It also makes it easier to handle your money. You can make the invoice creation step easier if you use an invoice template or a good invoicing tool.
It is important to know when you should use a standard invoice, tax invoice, or proforma invoice. This can make a big difference to your billing process. In this guide, we will talk about the types you will use most. We will show you how and when to use each one for your business needs.
Standard invoices vs. tax invoices
The main difference between creating and sending an invoice lies in the stage of the process. Creation involves preparing the document with all necessary details, while sending is the act of delivering it to the client. In New Zealand, the distinction between a standard invoice and a tax invoice is particularly important, especially for GST-registered businesses.
A standard invoice is a basic bill for goods or services. It includes essential information like your business details, the client’s details, an invoice number, and the amount due. It’s a simple request for payment and is suitable for businesses not registered for GST. A tax invoice, however, has additional legal requirements. If you are GST-registered and the sale is over $60, you must provide a tax invoice. It must clearly state “Tax Invoice,” show your GST number, and detail the GST amount.
Using accounting software can help you generate the correct type of invoice automatically. Here’s a simple breakdown:
|
Feature |
Standard Invoice |
Tax Invoice |
|---|---|---|
|
Purpose |
Request for payment |
Request for payment; required for claiming GST |
|
“Tax Invoice” Label |
Not required |
Required |
|
GST Details |
Not required |
Must show GST amount separately or state the total is inclusive of GST |
|
GST Number |
Not required |
Your GST number must be included |
|
When to Use |
If you are not GST-registered |
If you are GST-registered and the sale is over $60 |
When to use proforma and recurring invoices
Besides standard and tax invoices, there are other tools you can use for business needs. Proforma and recurring invoices help in different ways. A proforma invoice is a type of draft bill you send before you give any goods or ongoing services to your client. It lets them see a price estimate and check all the details before they decide. But, a proforma invoice is not a true invoice. It isn’t used for actual payment.
Recurring invoices work well for businesses that offer ongoing services for the same fee. If you bill your clients at regular intervals—like every week, month, or year—a recurring invoice is very handy. Many people use these for subscriptions, retainers, or service contracts.
Creating recurring invoices makes your billing process smoother, as it automatic. You save time and you do not miss billing people. It also helps you keep a steady cash flow as you know when you will get paid. You can use accounting software to set up and manage recurring invoices. It is easy to do and a good feature for staying on top of your money.
Sending invoices for international clients
Billing international clients can be easy if you use the right steps. You just need to be clear and give all the important information. This way, you can avoid problems and get your payment on time. Most people now send electronic invoices. This will also make your payment collection faster.
When you need to send an invoice to someone in another country, be sure to say what currency you are using. You should talk about this with your client before you send the invoice. Make it clear if the total amount due is in New Zealand Dollars (NZD) or in the client’s local money. This helps everyone know the exact amount to pay.
You will also want to offer payment options that can be used worldwide. Many people use bank transfers, but these can cost more and take a long time. You can also use online payment gateways like PayPal or Stripe. These often make international payments much easier and give you better exchange rates. No matter which option you choose, put all the needed details on your invoice. This includes your IBAN and SWIFT/BIC code for bank transfers. If you use online platforms, give a direct payment link.
This will help make the process smooth for you and your client.
What You Need to Get Started with Invoicing
Getting started with invoicing can be easy. You only need a few key details and the right tools to make the billing process smooth and clear. Be sure to gather the important information, pick a system that suits you, and set up the payment methods you want to use.
You may use an invoice template, or choose to use invoicing software. If you have everything ready from the start, you will save time. It can also help you get paid faster. Now, let’s check what information, tools, and payment setups you will need.
Essential information and documents required
Before you send your first invoice, you need to have some important information ready. This will help you with invoice creation and make the whole process faster. It will also make sure your invoice looks good and follows the law. Think of it like having the base you need for billing that works well.
One of the most important things on an invoice is your business name and your client’s details. You must have your full business name, your address, and contact details. You also need to get your client’s correct legal name, address, and who to contact in their company. If there is a mistake in these invoice details, you might see payment delays.
Here’s a checklist of things every invoice must have:
-
A unique invoice number, so you can track every invoice.
-
The date you send the invoice and a clear due date for when you want to get paid.
-
An itemised list of what you sold or the services you did, with the price for each.
-
The total amount due, with taxes such as GST included.
You get the best result when you do all this before you send out your first invoice.
Choosing the right invoicing software or platform
Choosing the best invoicing software can change the way you handle your bills. You can use templates and do invoices by hand, but using a tool made for this job will save you time and help cut down on mistakes. The right invoicing software for you depends on your business size, how much you want to spend, and what you need for your work.
When you look at your choices, think about ease of use. A tool with a simple, clear layout will make invoice creation and tracking easy, even if you do not know much about numbers. Lots of accounting software, like Xero, MYOB, or QuickBooks, has good invoicing tools built in. People in New Zealand like these because they join your billing with your other money plans.
If you are a freelancer or own a small business, you may want a quick and easy tool. Zoho Invoice or FreshBooks can work well for you. They often let you make your own kind of invoices, send payment reminders, and take payments online. Many offer a free plan or at least a free trial to help you see which one fits best before you buy. The main thing is to pick invoicing software that will help you work better and get your money faster.
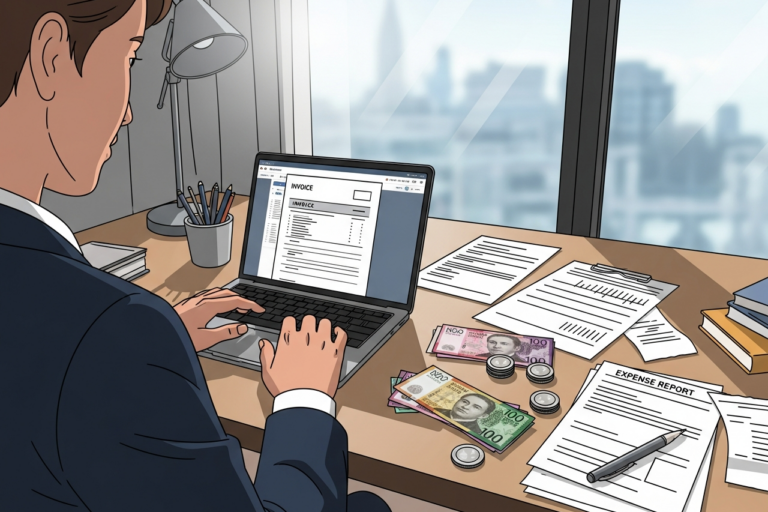
Setting up payment methods and bank details
To get paid, you need to make it simple for clients to pay you. You should set up clear and easy payment methods. The most basic way is with a direct bank transfer. Be sure your invoice shows your bank account number and your account name.
But, giving clients different payment options can help you get money faster. Many people like to pay by credit card or use online services. If you add payment gateways like Stripe or PayPal to your invoicing process, it is easy for clients to pay. These tools let you put a “Pay Now” button right on your electronic invoices.
When a client taps the payment link, they go to a safe web page. There, they can pay you by credit card or through their account. The money is then sent and put in your linked bank account. These services do take a small fee for each payment, but they can save time and give more ease. For any small business, these payment methods are a good choice.
Step-by-Step Guide to Sending an Invoice
Now that you know the basics, let’s go through the steps for sending an invoice. If you use a clear invoicing process, it will help make sure you do not miss anything important. It also helps you handle invoice payments well, from start to finish.
This way, you will make professional invoices, talk clearly with your clients, and get paid when you should. If you follow these steps, you can avoid mistakes and make your billing easy and steady.
Step 1: Prepare your invoice template with required details
The first thing you need for a smooth invoicing process is to build a good invoice template. This will make it easy each time you want to bill someone. You do not need to start from nothing every time. By using a template, you and your brand will look more steady and serious. You can set one up with a word program, a spreadsheet, or invoicing software.
Make sure your template has all the main invoice details. That means you want spots for your business name and your logo, your contact info, a unique invoice number, and the invoice date. You should also add parts for your client’s info, a list of the work or items you sold, the subtotal, any tax such as GST, and the last amount your client needs to pay.
A lot of invoicing software has customizable invoice templates. You can shape these to match your brand. This will help things look good and also means you include all key info to meet rules set in New Zealand. Giving time to set up your template is a big step in getting invoice creation done right.
Step 2: Add client and project information
Once you have your template set up, you need to add the client and project details for the job you are charging for. It is important to get all this right, so the invoice goes to the correct person and does not hold up the payment.
Begin with your client’s details. You should include the correct customer name, company name if there is one, and their email address or street address. Make sure you double-check these contact details. This helps stop the invoice from landing in the wrong place, which is one of the main reasons for payment delays. If you know someone in the accounts area, it is good to send it to that person.
After that, put in the project info. Make a list of all the services you did or the goods you provided. Say how many you provided, how much each one cost, and the total cost for each. Write a clear note for every item, so your client knows what they need to pay for. This keeps things open and helps avoid problems or long questions. When you do this, you build trust and there is a better chance you will be paid quickly.
Step 3: Set payment terms and due dates
One of the most important things for an invoice is to make your payment terms clear. This part shows your client how and when to pay you, so there is no confusion. Start by giving the invoice due date in a clear way. You can use terms like “Due upon receipt” or “Net 30,” which means payment is needed in 30 days. Still, it’s best to state the exact date, like “Due by 25 October 2024.”
After that, you need to show which payment options you take. Give your bank account details for direct payments. You can also add a link for online credit card payments, or your details for other sites like PayPal. When you make it easy for people to pay, you are more likely to get your money quicker.
You should also include your rules about late fees and what happens if people pay late. Even though it can feel hard, it is smart to say what happens if an invoice is late. For example, write something like, “A late fee of 2% per month may be applied to overdue accounts.” This helps make things clear from the start. It also helps you encourage fast payment if the due date goes by without payment.
Step 4: Finalise, review, and attach supporting documents
Before you send it, take a bit of time to check and finish your invoice. This step matters a lot. Even a small mistake or typo can confuse people and hold up their payment. That is why you need to look over all the invoice details. Check that names, addresses, dates, and amounts are all correct.
Make sure the maths is right too. Look at each item, the subtotal, any taxes, and the last total to be sure they all add up. Invoicing software the is helpful for this, as it usually does this work for you. It can stop errors and help you avoid problems later. Checking your work now is a good way to stop awkward chats with your client or re-sending a new invoice.
Also, think about any extra documents that might help. These can be things like a signed contract, a time sheet, a purchase order, or a list of expenses. Sending these with your invoice email helps the client see all they need and can make payment happen sooner, which will cut payment delays.
Step 5: Send the invoice via email or online tools
The last thing to do is send the invoice to your client. The best way to do this is by email. It is quick, easy, and gives both you and the client a digital record that you can check later. When you send your invoice email, add the invoice as a PDF file, not in the main part of the email. This looks better and helps your client save or print the file if they want.
You do not have to write a long invoice email. Make the subject line clear, like “Invoice [invoice number] for [Project Name].” In the main part of the email, be polite and keep it simple. For example, you could write: “Hi [Client Name], Please find attached the invoice for our recent work. Thank you for your business!”
You can also use online tools or invoice software for this step. These tools can send the invoice straight to your client. They often add secure payment links in the invoice email, so your client can pay by credit card in just a few steps. This makes the payment process faster for both of you and helps make your work run well.
Best Practices for Sending and Tracking Invoices
Sending an invoice is just one part of the job, but tracking it matters just as much. Having the right invoicing process will help you keep a healthy cash flow and keep your work with clients positive. You need to be on top of payment reminders and use tools to check the status of payments.
If you set up a solid system to send and track invoices, you can cut down on late payments. It also helps you keep your money matters tidy. A good accounting system can handle a lot for you, like sending payment reminders and tracking invoices as well. Now, let’s look at some top tips to help you manage the invoicing process and keep things running well.
Tips to ensure timely payment
Making sure you get paid on time is very important for the money side of your business to be good. The best way is to talk about payment terms early on and be very clear. If you let the client know how you want to be paid, from the start, it puts things in order and helps everyone understand what will happen.
After you send the invoice, you should not worry about sending payment reminders. It is fine to be polite but clear. A friendly payment reminder before the due date helps a lot. If there is still no payment, send another reminder just after the due date has passed. Doing this often teaches your clients to pay you on time.
Here are a few more ideas to help you with timely payments:
-
Offer multiple payment options: Make it easy for people to pay you. You can use bank transfer, credit card or online payment gateways.
-
Consider early payment discounts: Try a small discount if they pay before the due date. This gives them a reason to pay you faster.
-
Implement late fees: Write your late fees policy on the invoice. This lets your clients know they could pay more if they are late, and that pushes them to pay on time.
How to track invoice delivery and client responses
After you send an invoice, you will want to know if it has been received and when you might get paid. Good invoice tracking helps you stay on track and keep your cash flow in check. You will always have a list of who paid and who did not. Modern tools can help you do this.
If you are using accounting software or an invoicing platform, you can often tell when your invoice email has been delivered. You can also see if your client has opened it. This is very helpful because it shows the client got it, and you can avoid payment delays when people say, “I never got the invoice.” The system will update or change the invoice status for you when the payment comes in.
If you are sending invoices by email without these tools, you might not have these handy features. In that case, it is a good idea to ask your client to confirm they got the invoice in your invoice email. If you send an invoice by mail, think about paying for a delivery service so you know when it has been received, especially if the invoice is large or important. Using a simple spreadsheet to write down when invoices are sent, viewed, and paid is an easy way to manage your accounts if you don’t use accounting software or an invoicing platform.
Conclusion
To sum up, knowing how to send an invoice in New Zealand is important if you are a freelancer or have a small business. It helps you be seen as professional and also helps you get timely payments. If you get to know the different types of invoices, what is needed by the law, and follow some simple best steps, you can make your invoicing process easier. This also helps you look after your cash flow better. The most important part is to be clear and stay professional—make sure your invoices are done well, have the right details, and get sent on time to your clients. If you want to ask more or need help, just get in touch for a free talk!